Getting Started with Create React App
January 31, 2018
create-react-app is a handy CLI tool which allows you to quickly create and run a React application with no configuration. In this post (and the above video) I'll show how to get started with create-react-app and long the way, we’ll look at each of its built-in scripts and also investigate various ways to keep your react-scripts dependency up-to-date.
Installation
First, you'll need to verify what version of node and npm you have installed. You can do this on the command line by typing...
node -v && npm -v
You need at least Node version 6 or above on your dev machine in order for create-react-app to work. If you are using npm version 5.2 or above you can utilize the npx package runner instead of having to install create-react-app globally.
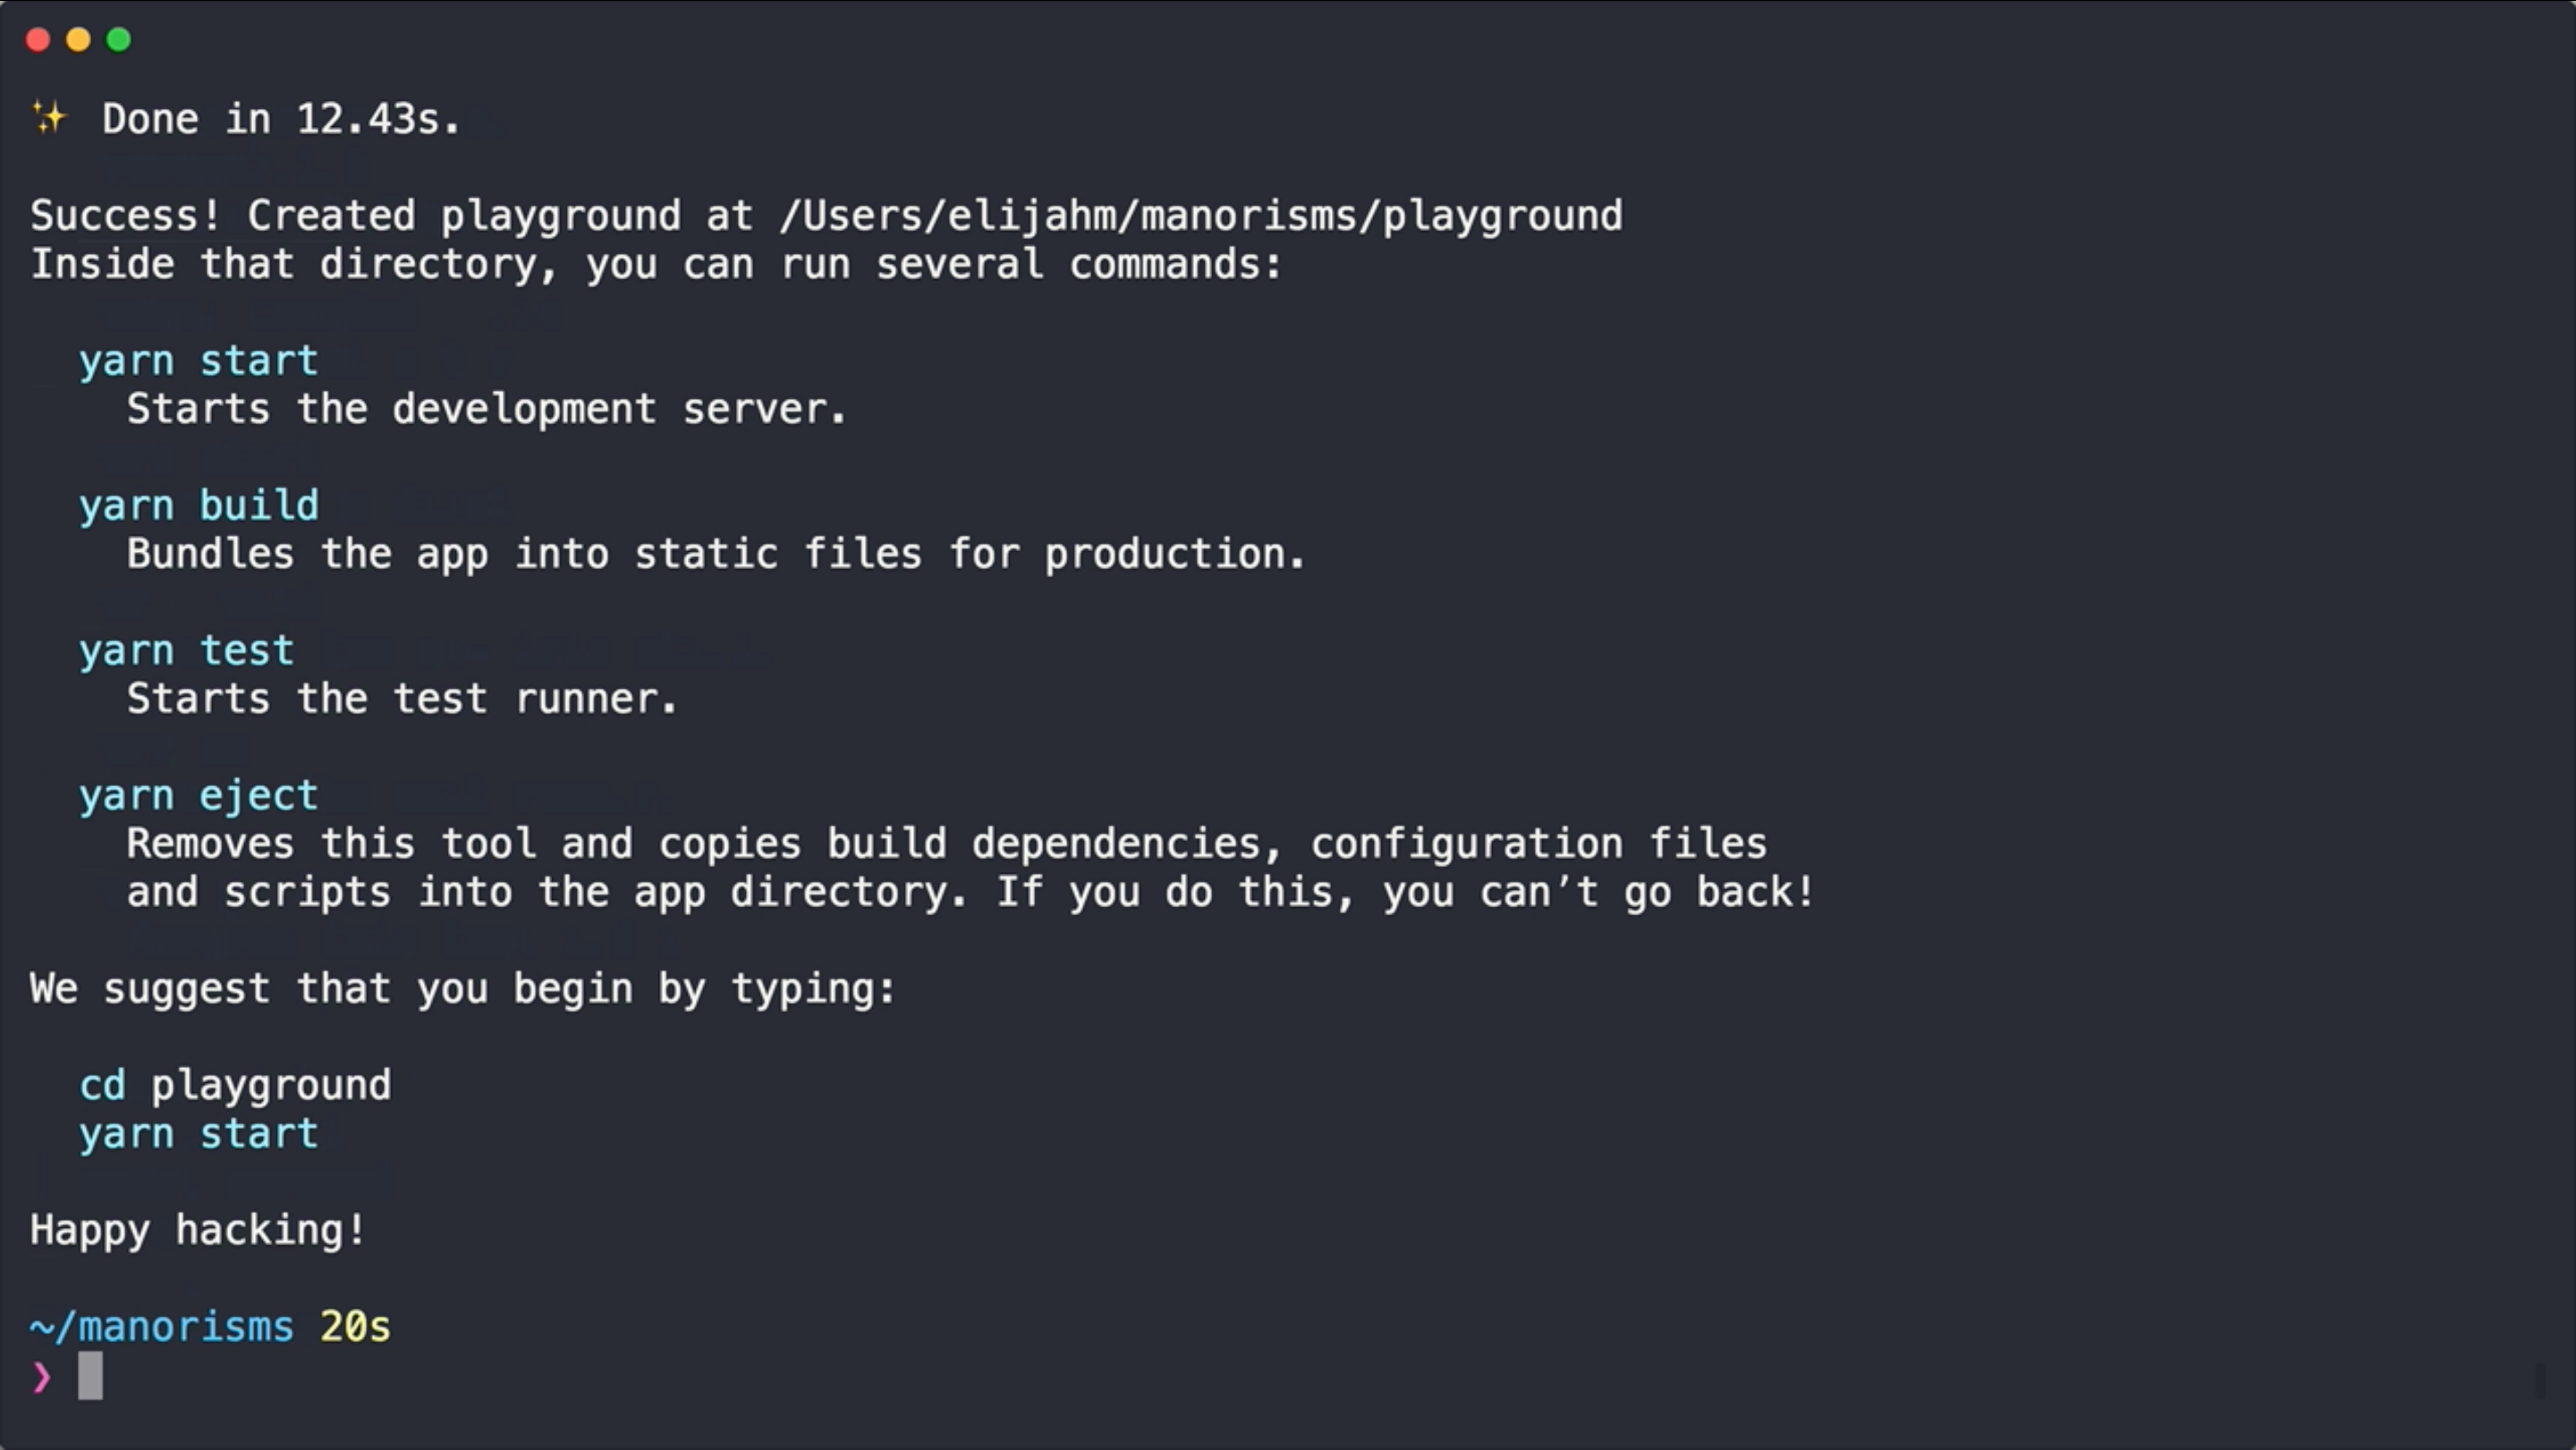
To create your React app you can run...
npx create-react-app playground
That’ll create a new playground React app and start to install all the dependencies that it needs to run, build. etc…
Native npm Scripts
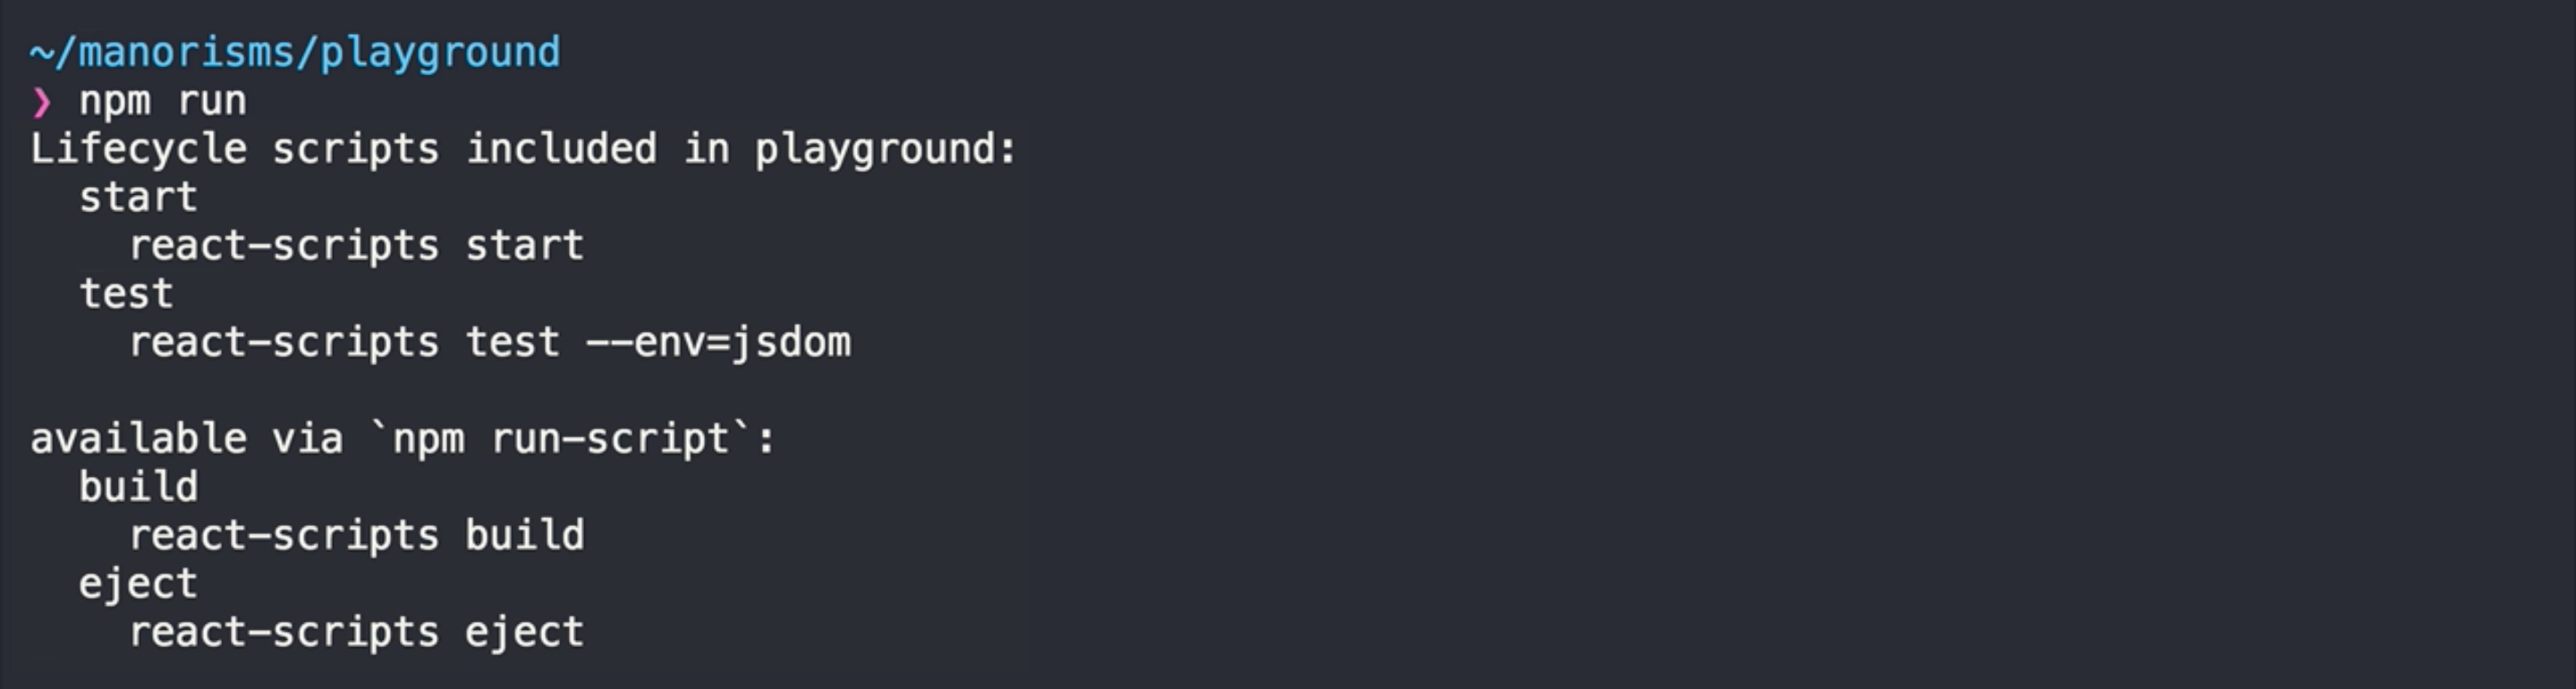
Once the app creation has completed and it's dependencies have finished installing, you can change directories to your new project and execute npm run in order to see all the scripts that are available.
cd playground
npm run
You should see start, test, build, and ejects scripts listed in your terminal. We will go through these scripts and show you what they do.
start Script
npm start
The start script will kick off a development server for your app and launch a browser instance to the correct URL.
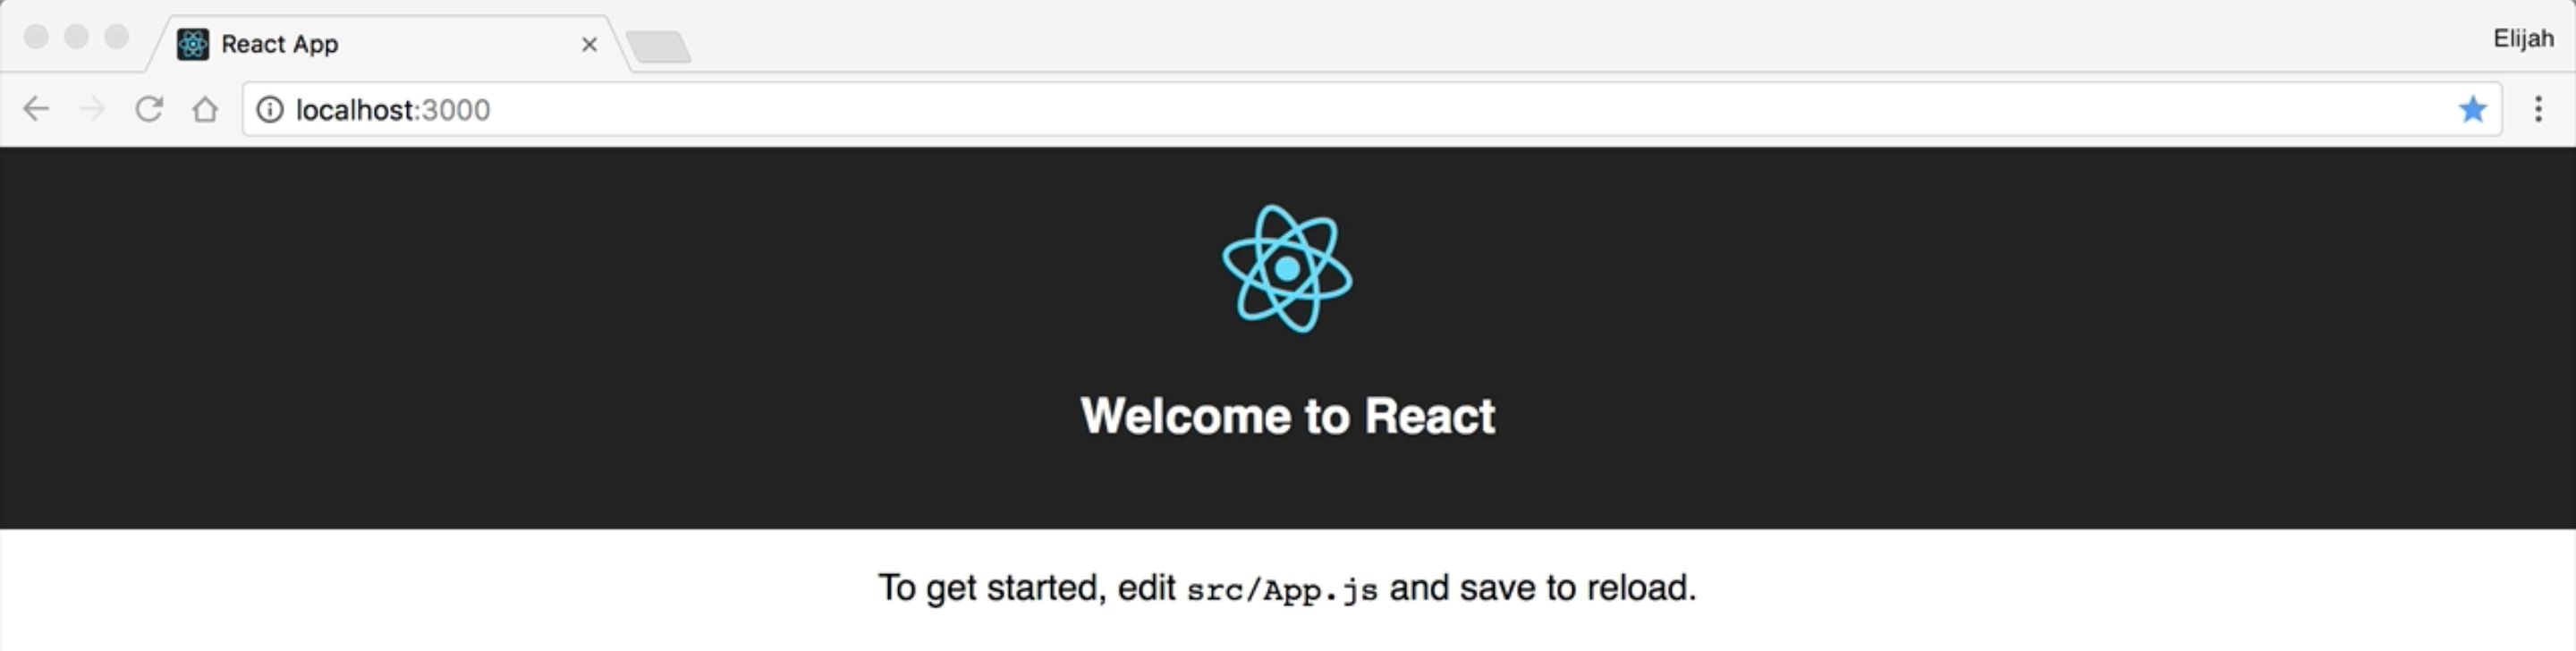
The folder structure of the generated app is pretty straightforward. Most files can be found in the src folder. The index.js file is where our App begins. You can see the ReactDOM.render where it attaches to the root DOM element. The App.js file contains the App React component where the main header and intro text can be found.
The package.json file, in particular, is a sight for sore eyes. Where are all the dependencies!?! There are only 3 depedencies: react, react-dom, and react-scripts. The react-scripts dependency manages all of the other dependencies such as babel, webpack, `jest', etc...
Even the npm scripts are just thin proxies to functionality inside of react-scripts.
test Script
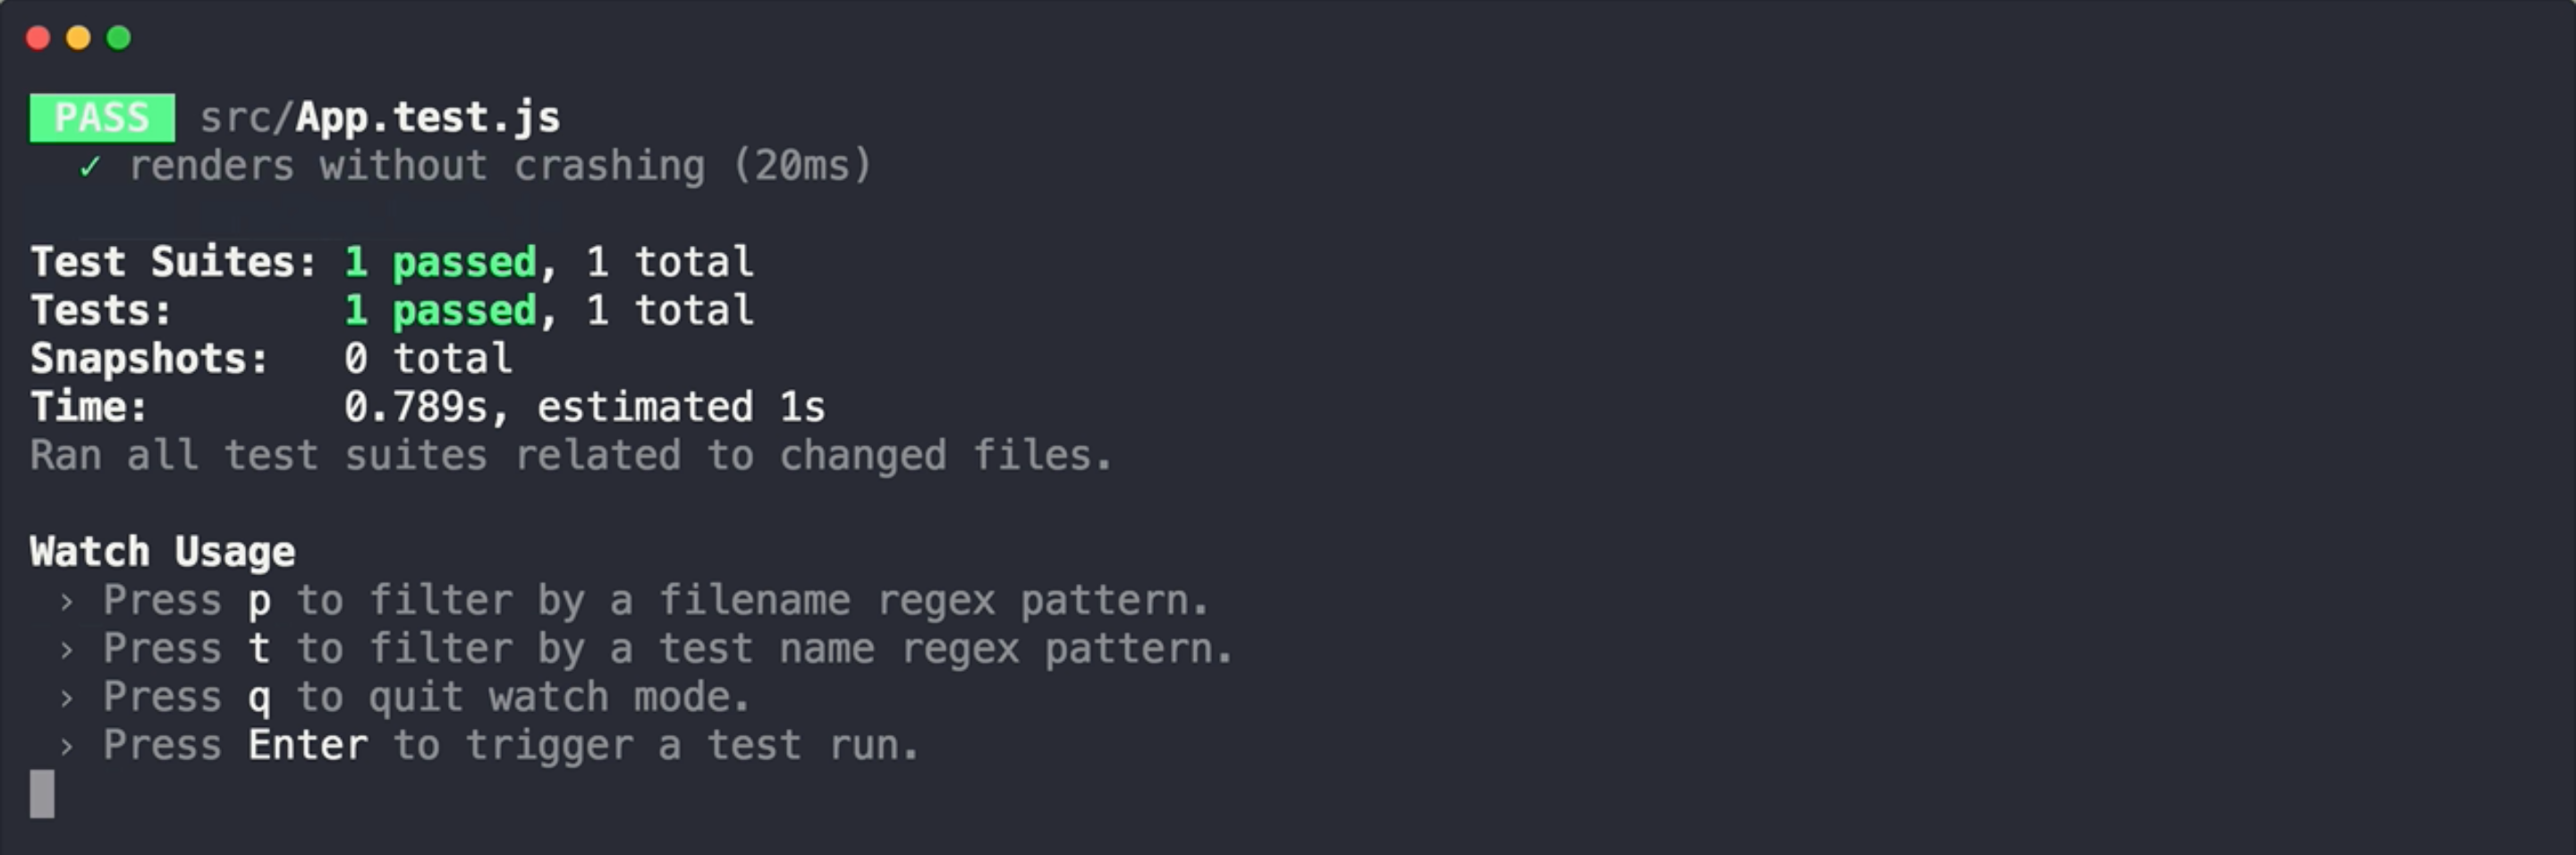
npm test
Under the covers React uses the Jest test runner, which is a really nice tool.
Out of the box, the generated app only has one unit tests, but you are highly encouraged to write your own tests once you start building out your app.
build Script
npm run build
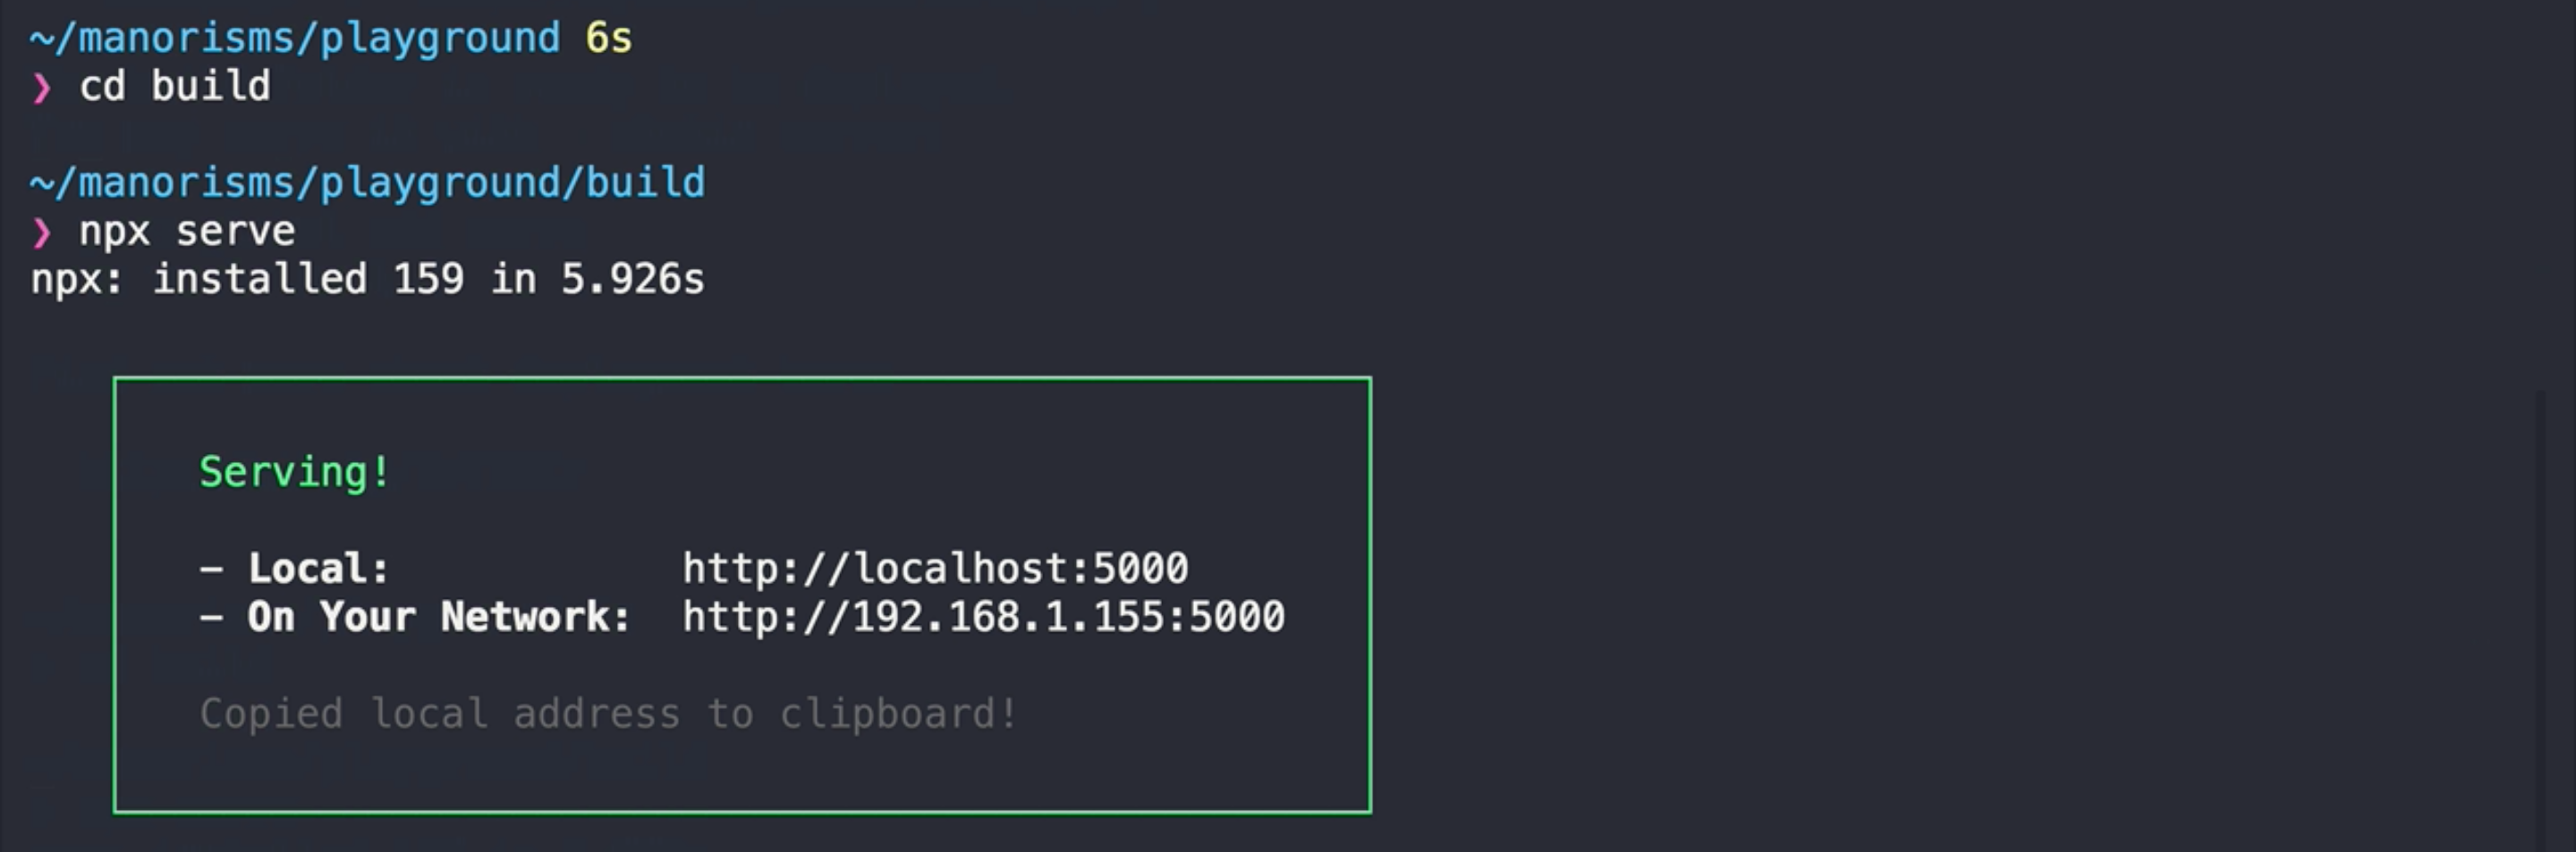
The build script will create a production build of your app and output the results to the build folder.
Once the build is complete, you can go into the build folder (cd build) and kick up a simple http server with npx serve
cd build && npx serve
At that point, you can head over to your browser and take a look at a built version of your react app.
eject Script
npm run eject
If the application that was generated by create-react-app doesn’t quite fit your needs (babel config, webpack config, etc…) then you can use the eject script, which will export all of your app's dependencies, configurations, and scripts and inject them into your app.
This is permanent. There will no longer be a quick and easy way to upgrade your app if Facebook makes a new version of react-scripts.
Once you eject you'll see a new config folder that contains stuff for jest, polyfils, and various webpack configurations.
Also, you'll have a scripts folder that contains code for your build, start, and test scripts.
In addition, the package.json file is MUCH larger than it used to be. You’ll notice that there are many dependencies that could possibly use updating. The react-scripts dependency used to take responsibility of keeping the dependencies up-to-date and compatible, but now that is your responsibility.

Various Ways to Update react-scripts
As your app gets older, newer version of react-scripts may come out. These newer versions may come with bug fixes or new features that you may want to leverage.
Using Native VSCode
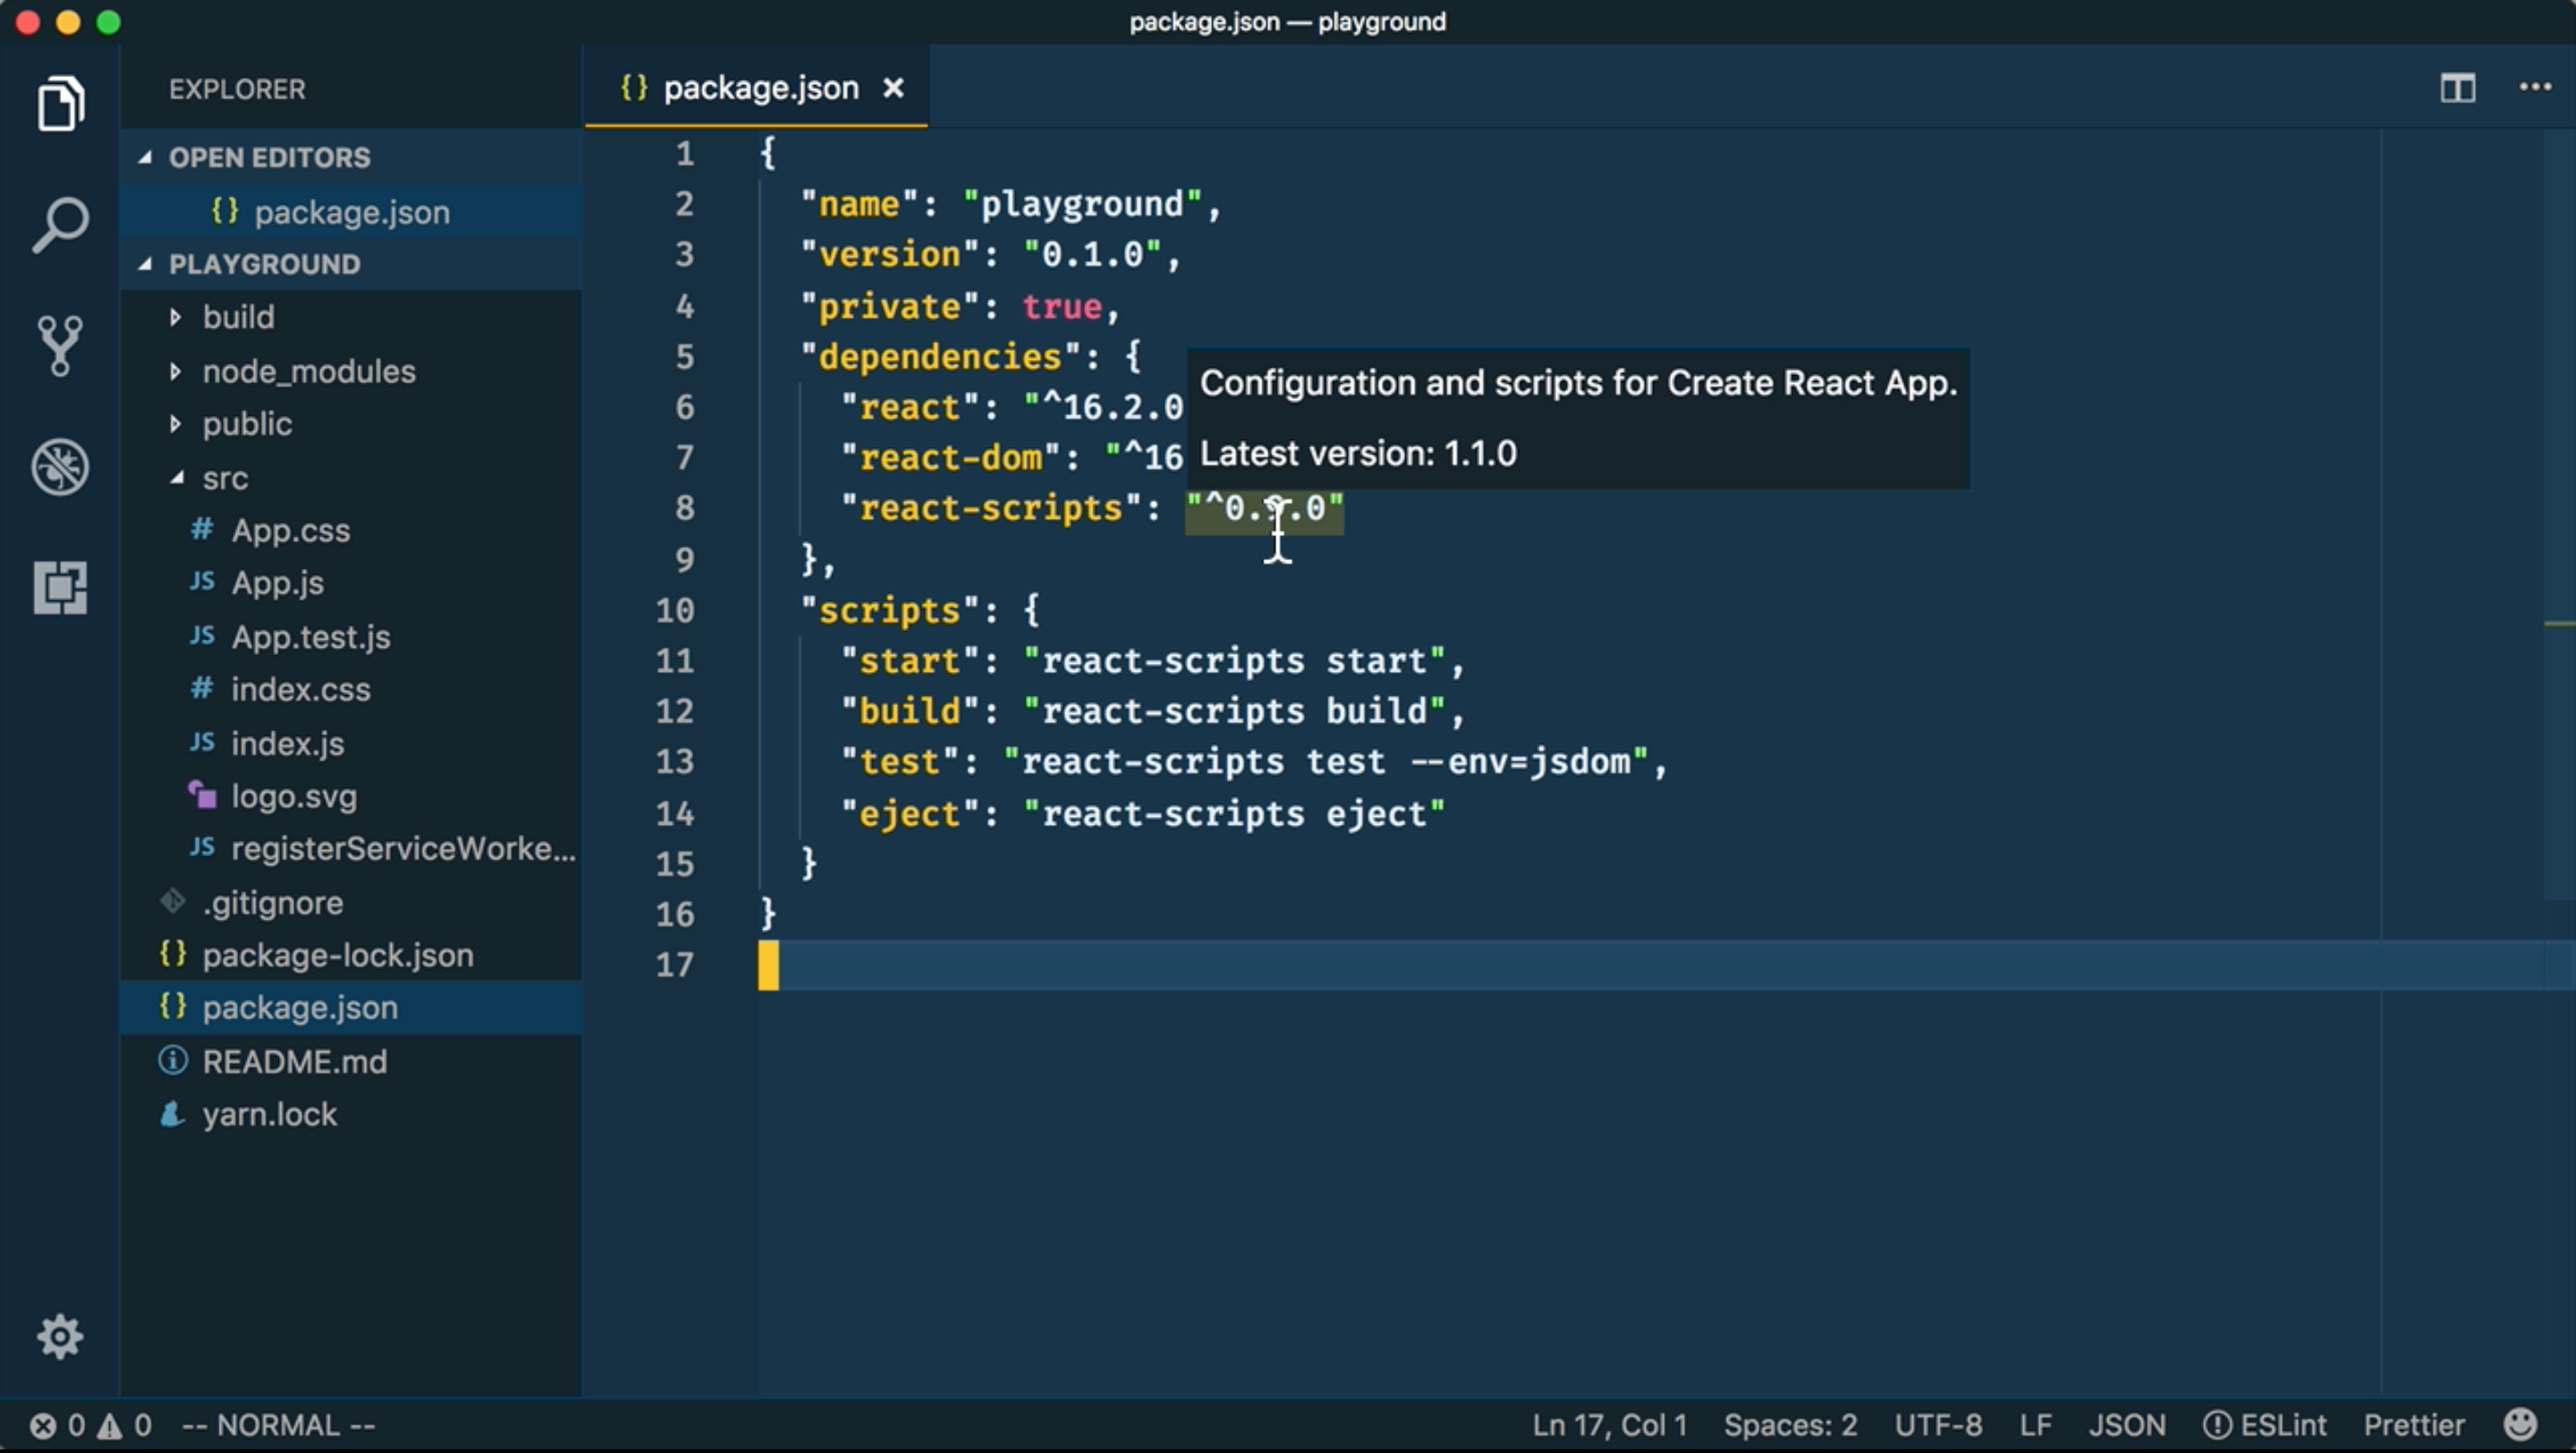
If you have an older version of
react-scripts, then you can open up thepackage.jsonfile and hover over your dependency to see what the latest version of that dependency is! Cool, right?Using VSCode Extension
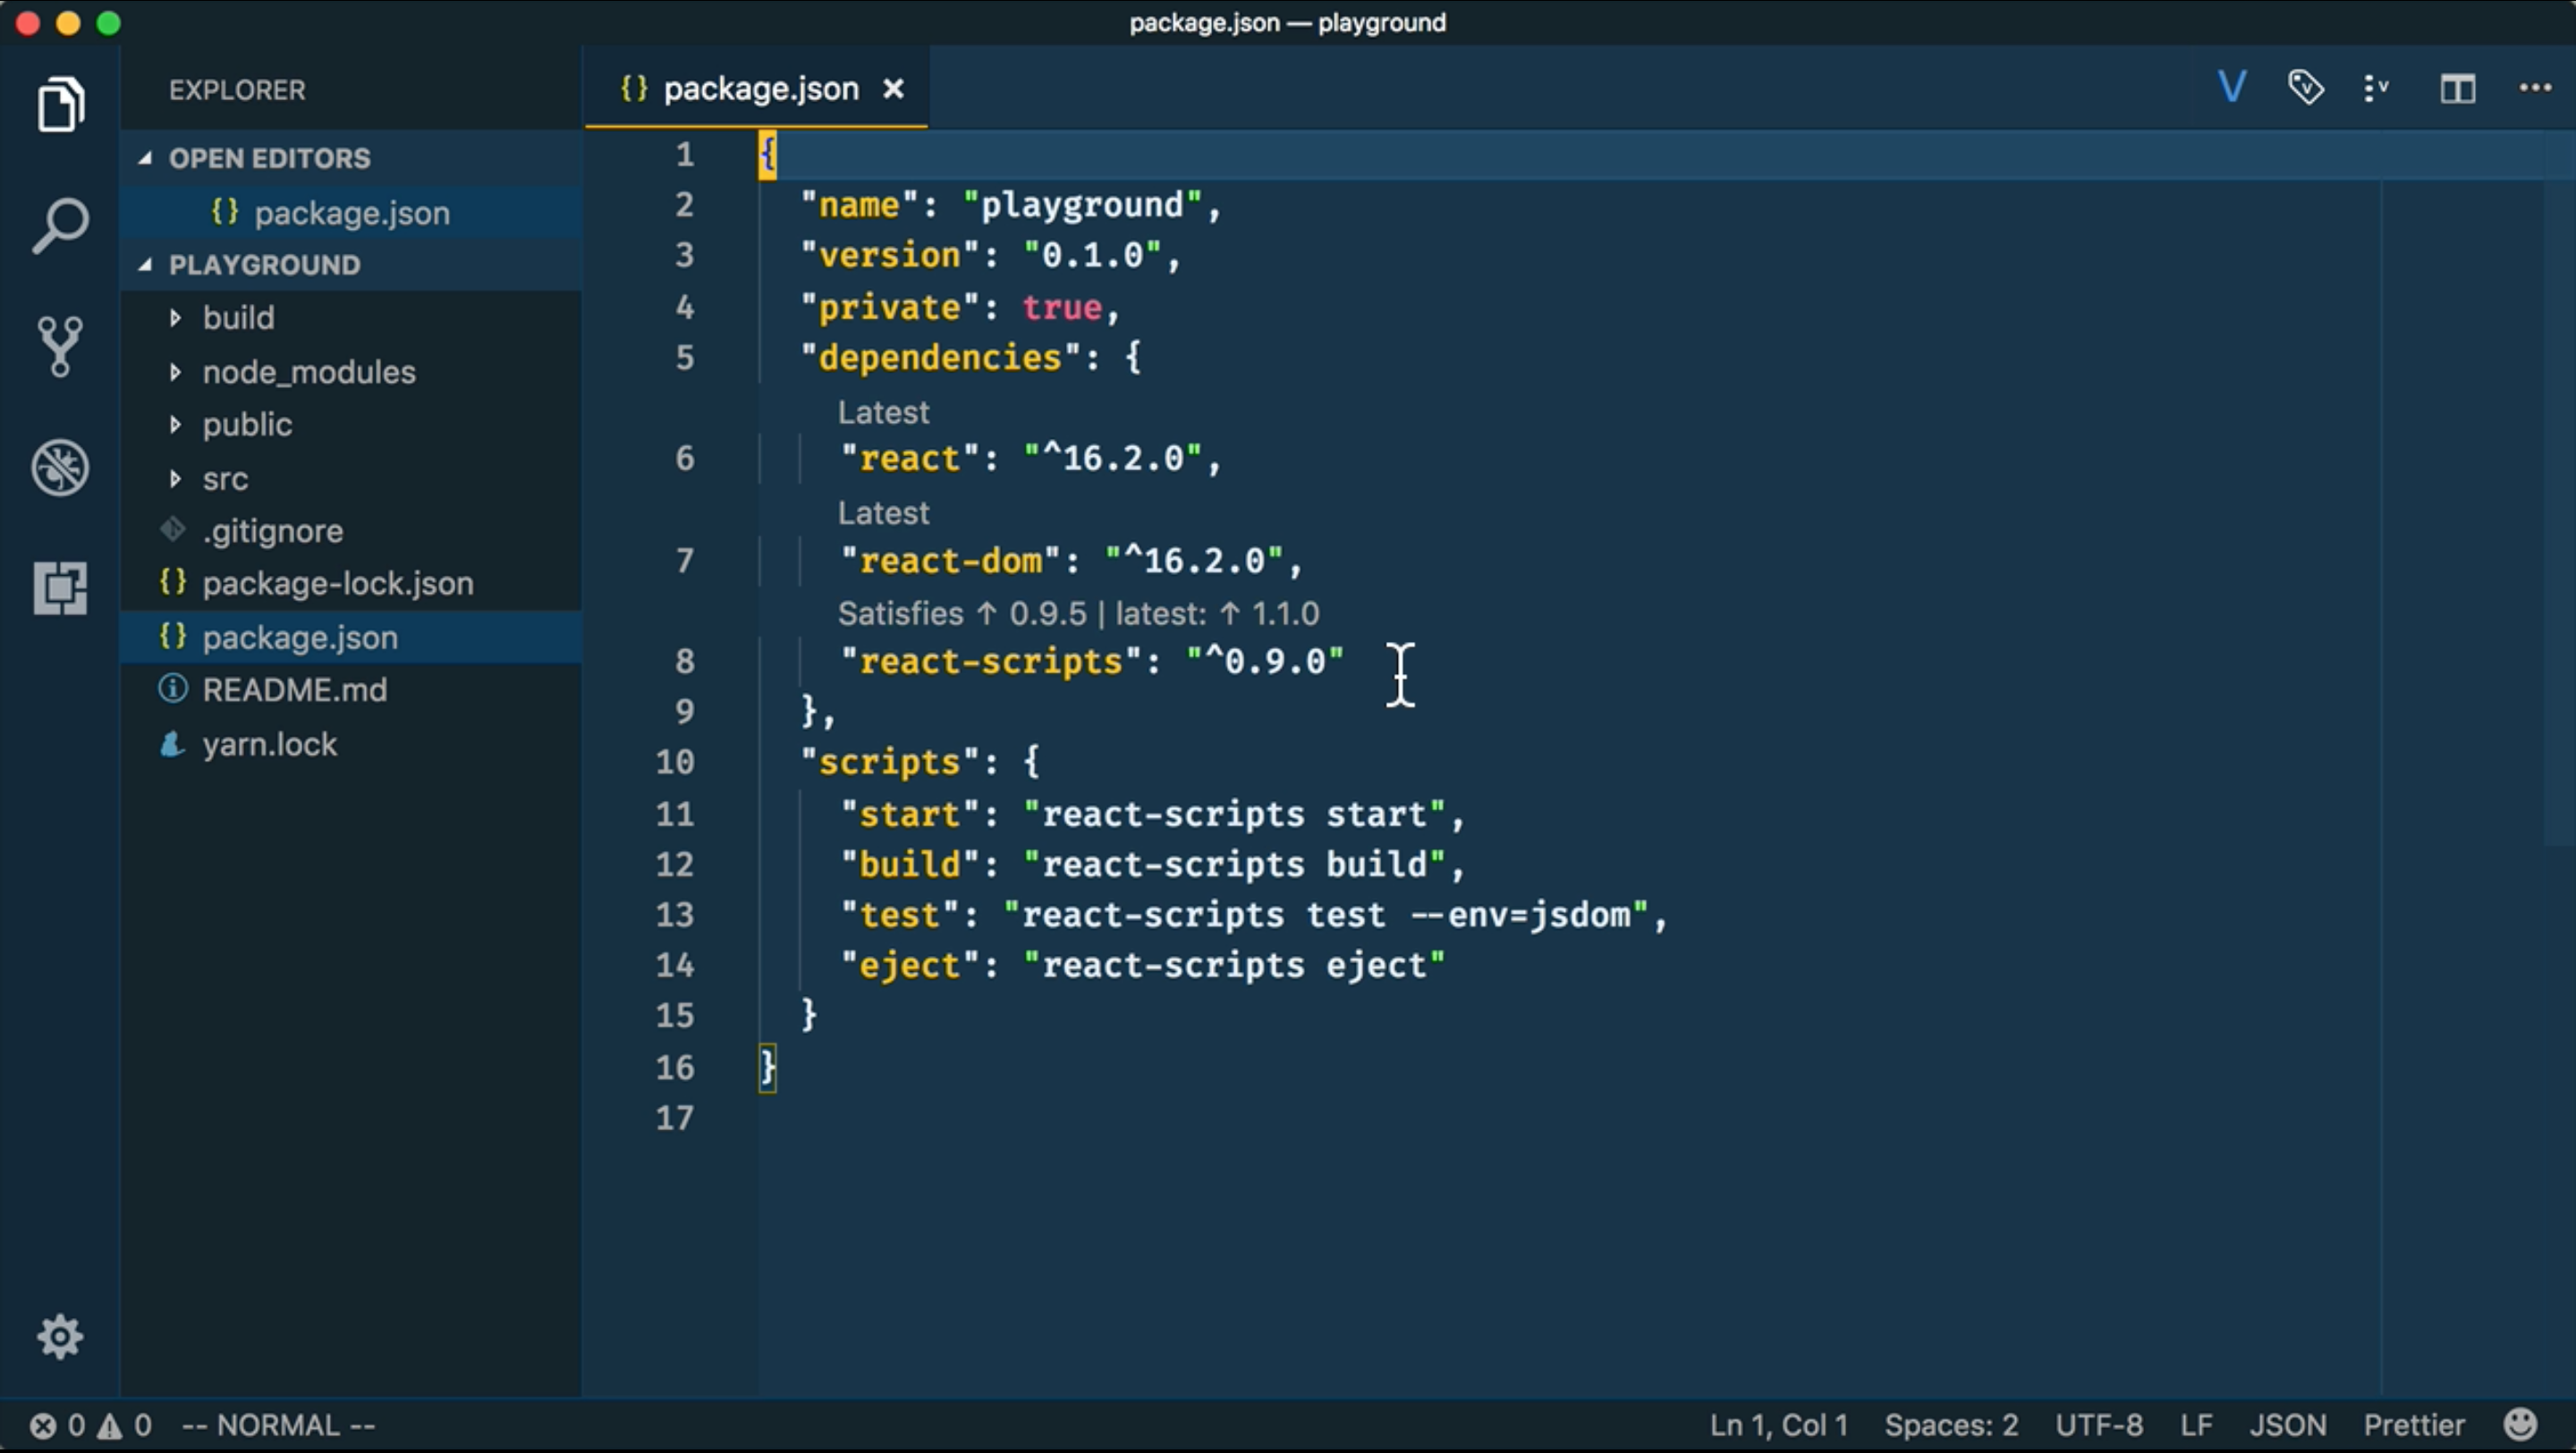
If you do use VSCode, you could go one step further and install an extension called Version Lens. Once installed this extension adds metadata to your package.json dependencies. The extension will indicate if you are using the latest version, what version it'll update based on the range you specified, and also show the latest version published in
npm. You can also click on the metadata links to update yourpackage.jsonfile with the new version.Using
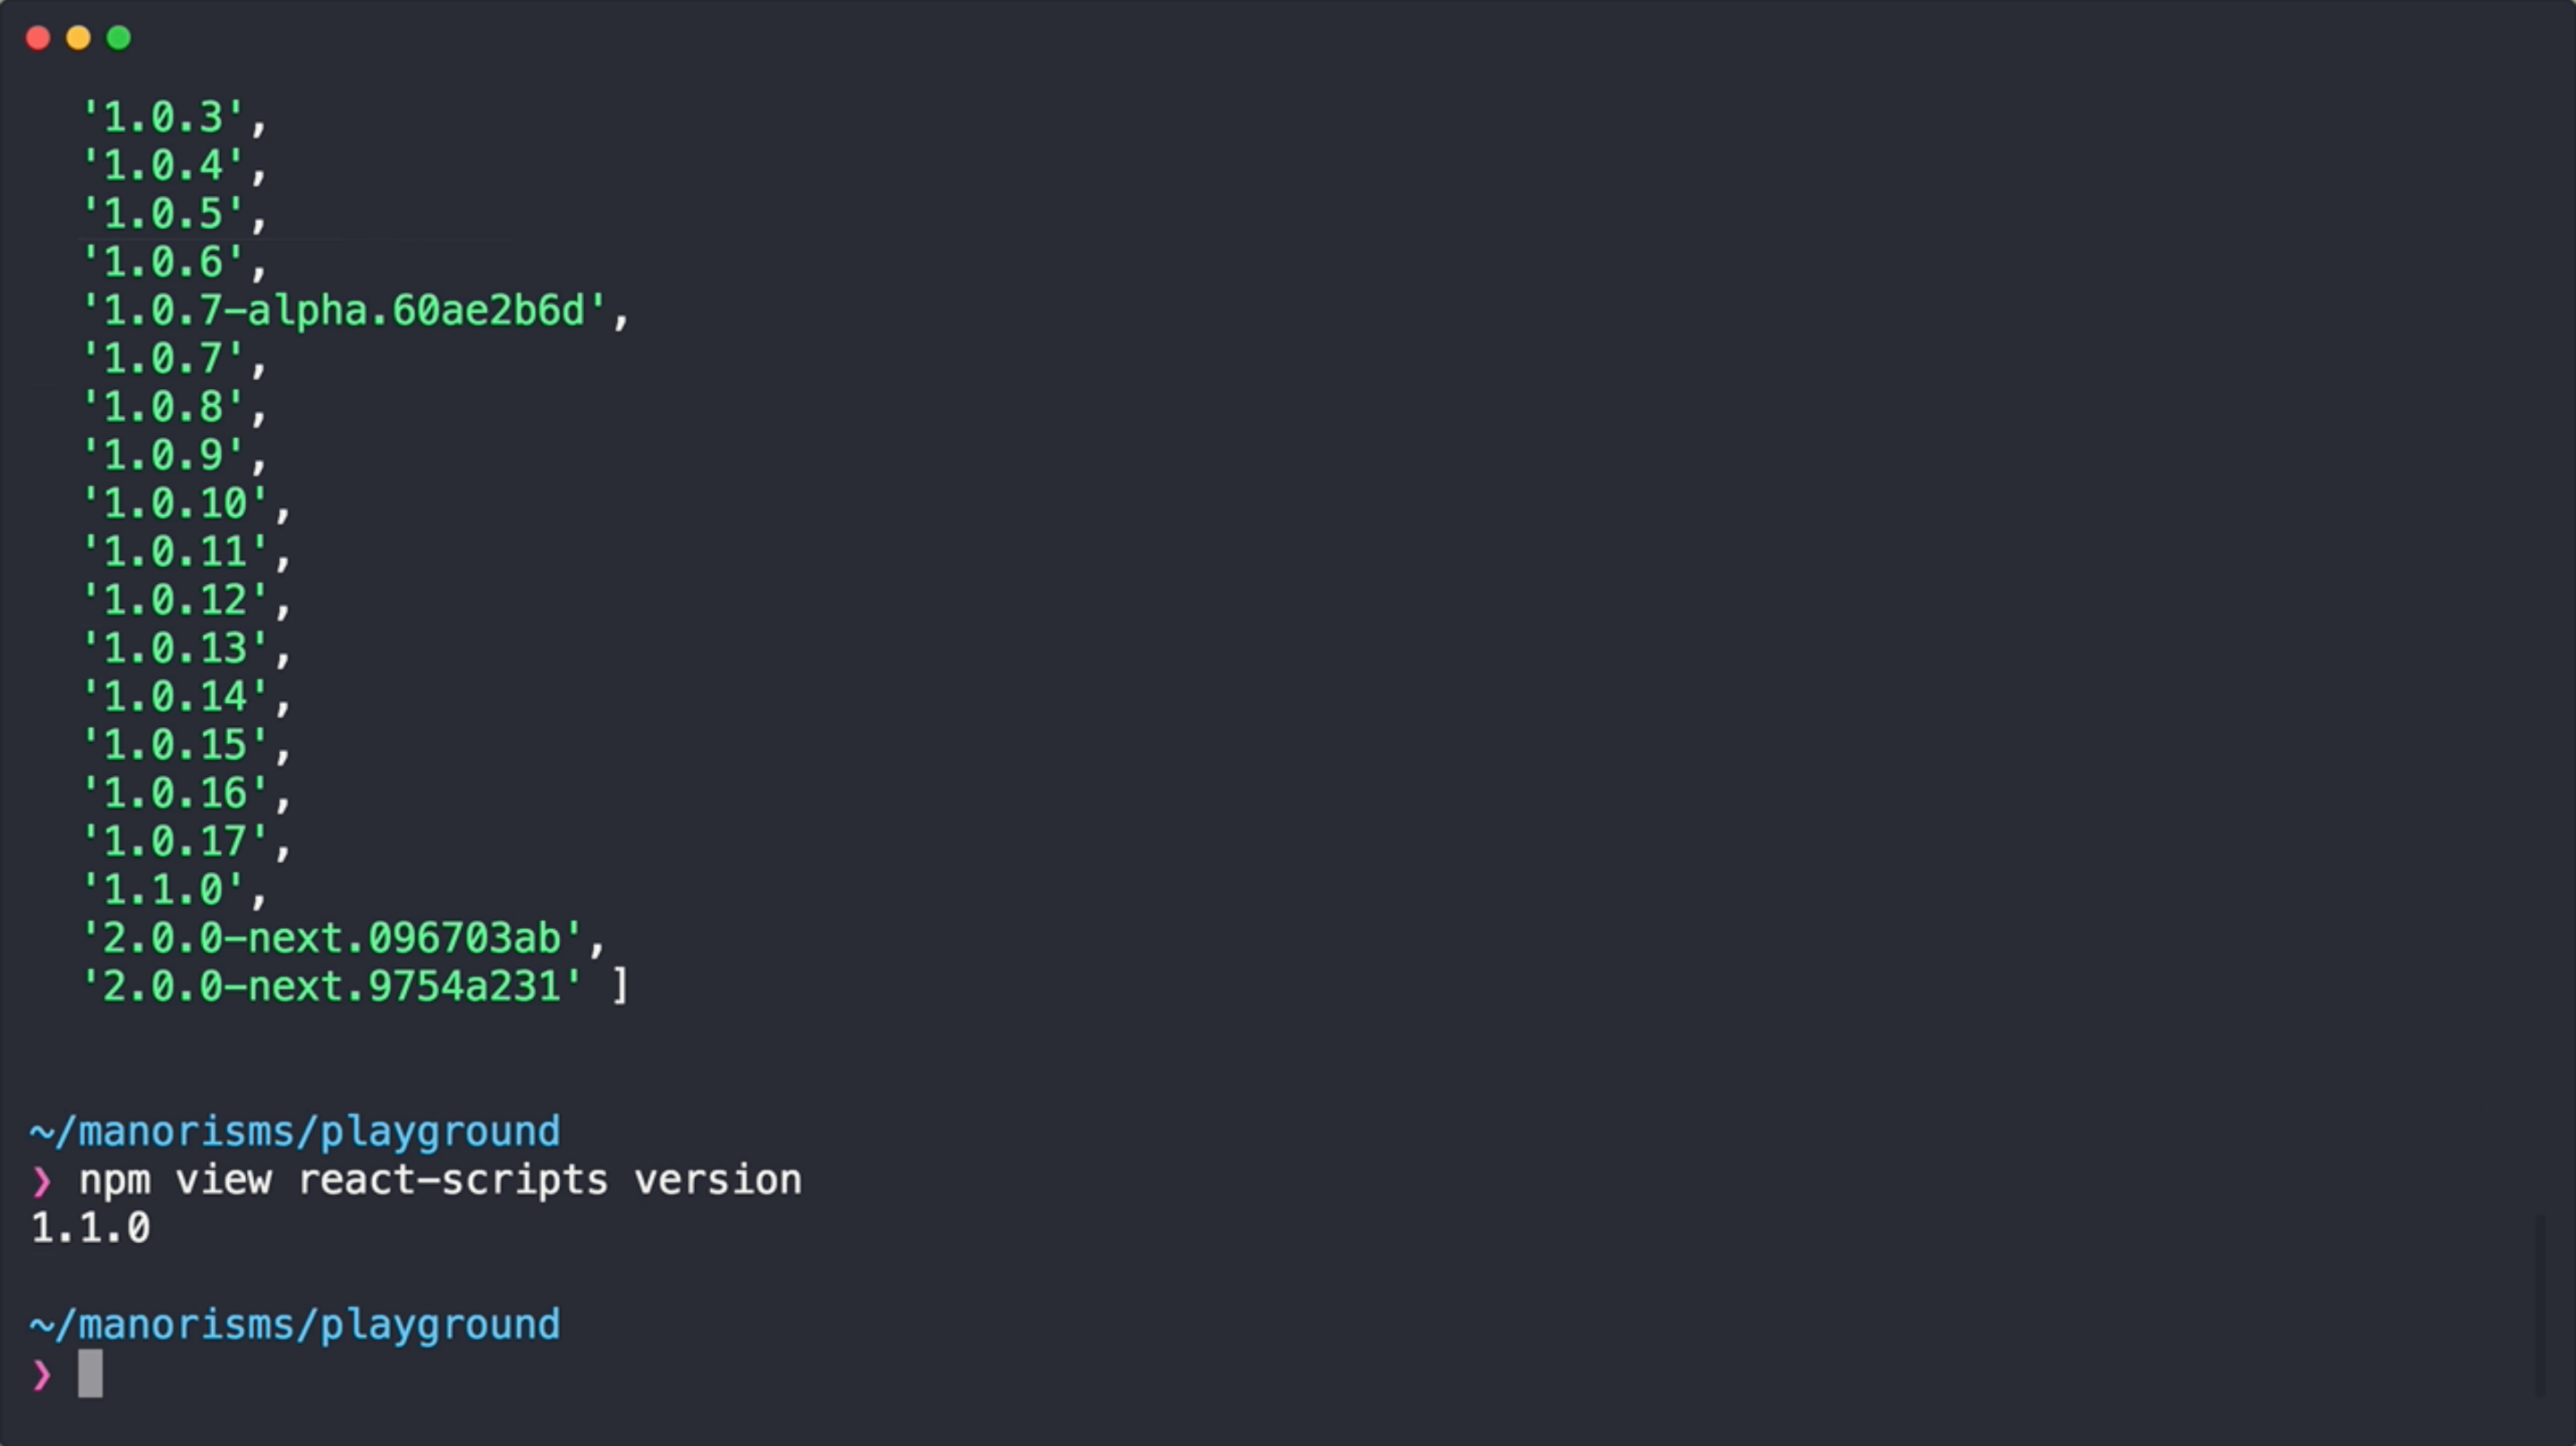
npm viewFirst let’s run
npm view react-scripts versionsthis will list out all of the versions that have been published to npm.If you want just the latest official release you can try the same command, but remove the
sat the end.Using
npm outdatedAnother command you can try is
npm outdated, which is a native npm command. It’ll check the registry for you and see if you have any packages that are currently outdated.The output will list the current version installed, the highest version based on your supplied version range, and the latest version that has been published. This is a great command, however, it is read-only.
Using
npm-checkIf you want a more interactive update tool, you can try out
npm-checkwith the-u(interactive update) flag.The output is an interactive list of dependencies that need updating. You can navigate through the list and select one or more with the space bar and then enter to install.


Conclusion
I hope you found something helpful from this post. The above video is the first in a series about create-react-app, so stay tuned.
This is the first post in a series about
create-react-app. The next post in the series is Debugging a Create React App with VS Code.
Tweet about this post and have it show up here!