Position and Align Text inside a react-blessed <box> Element
July 31, 2020
This is the 7th post in a series where we will be creating a developer dashboard in the terminal using react-blessed and react-blessed-contrib. For more information about the series and to take a sneak peak at what we're building, go to the 1st post in the series for more context.
- Bootstrap
react-blessedApplication - Add ESLint Rules to
react-blessedApp - Change text font with
figlet - Extract Component and Add
useIntervalhook - Fetch and display current weather with
weather-js - Extract custom hook to simplify data fetching
- Change text color with
chalkandgradient-string - Position and Align Text inside a
<box>Element - Make a Percentage Based Layout
- Layout Dashboard with
react-blessed-contribGrid
NOTE: You can find the code for this project in GitHub and you watch the whole Build a Terminal Dashboard with React video series on egghead.io.
Current Application
Here we have the beginnings of a React Terminal Dashboard. If we come to the terminal and kick off our app with npm start you'll see a sightly colored version displaying the date, current time and weather information.
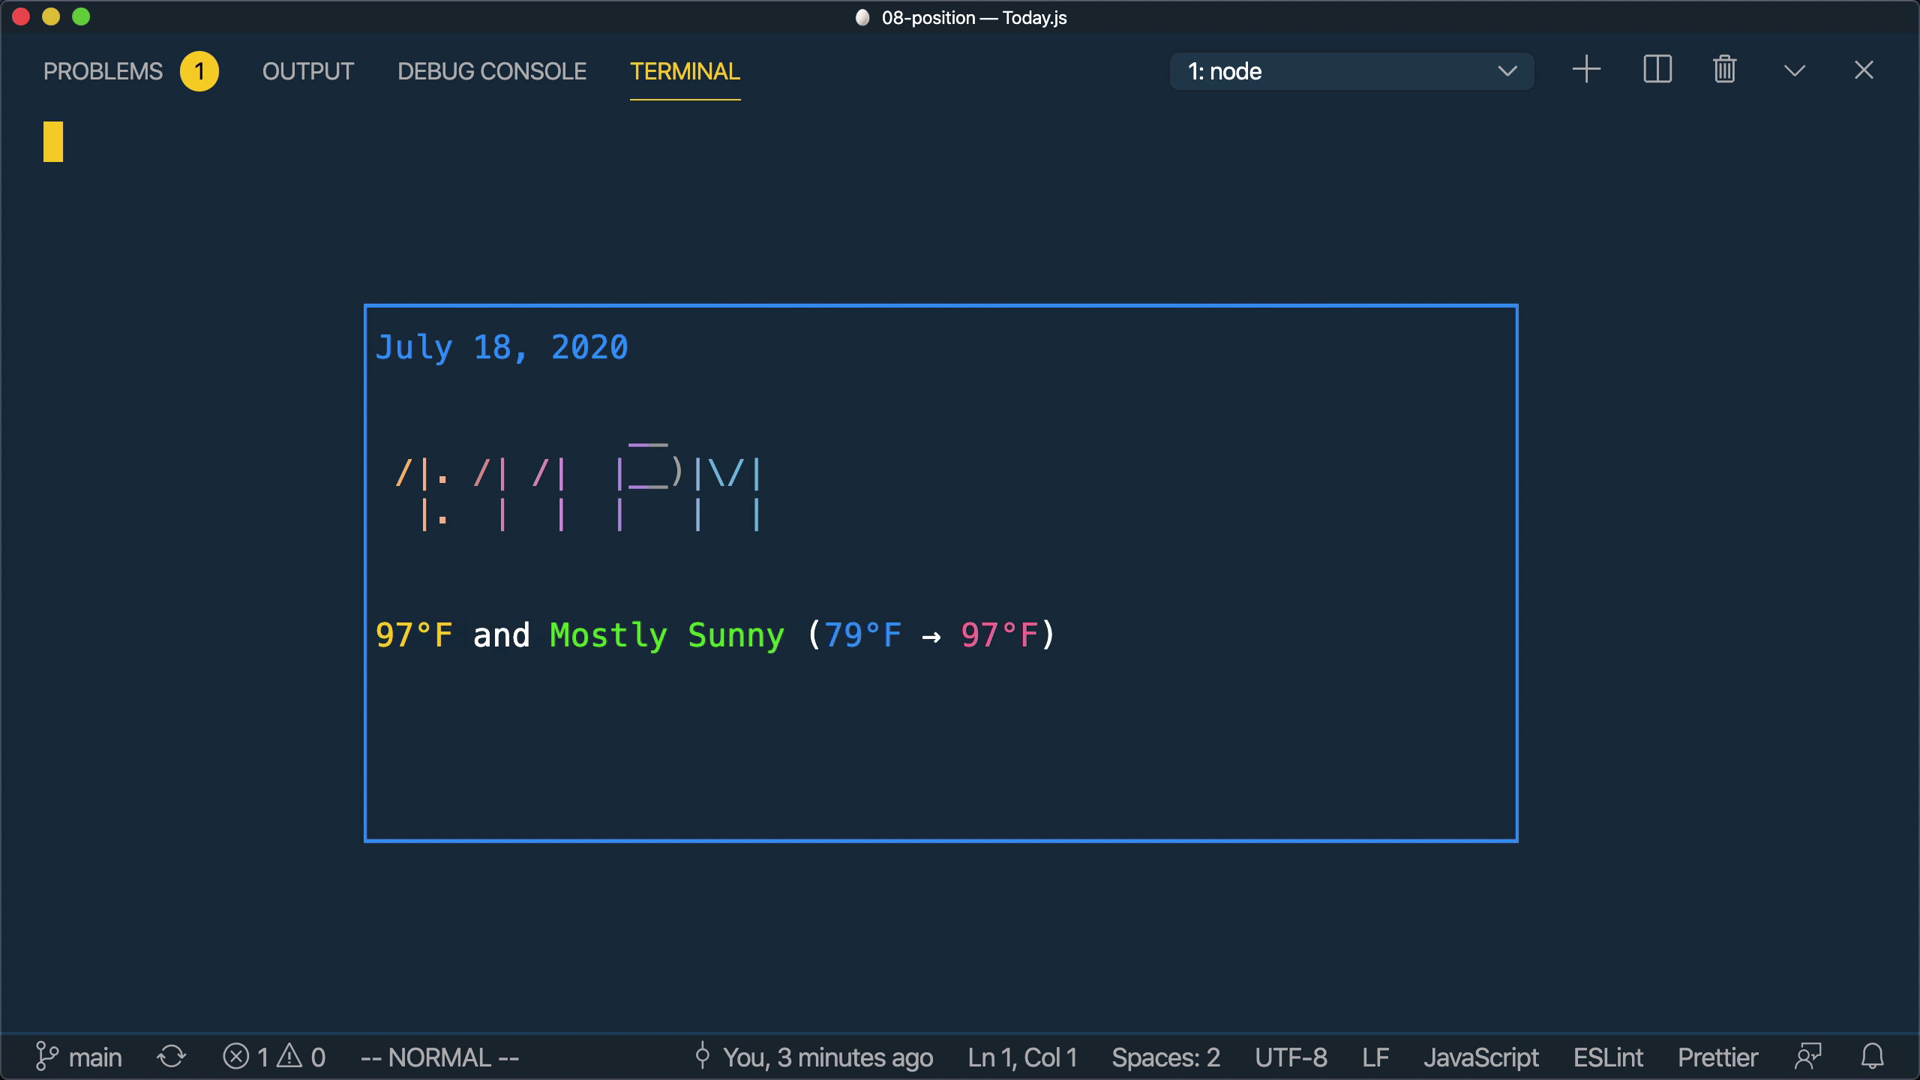
However, at this point everything is left aligned. So let's explore about positioning elements with-in the box.
Replace String Template Literal with <text> Elements
Currently we've been handling position with a multi-line string template literal, but that is pretty limiting.
export default function Today() {
  /* ... */
  return (
    <box { /* ... */ }>
      {`${chalk.blue(date)}

${gradient.atlas.multiline(time)}

${
  weather.status === 'loading'
    ? 'Loading...'
    : weather.error
    ? `Error: ${weather.error}`
    : formatWeather(weather.data)
}`}
    </box>
  );
}
So first, let's take each piece of information (date, time, and weather) and put them into <text> elements.
export default function Today() {
  /* ... */
  return (
    <box { /* ... */ }>
        <text>
            {chalk.blue(date)}
        </text>
        <text>
            {gradient.atlas.multiline(time)}
        </text>
        <text>
            {weather.status === 'loading'
                ? 'Loading...'
                : weather.error
                ? `Error: ${weather.error}`
                : formatWeather(weather.data)}
        </text>
    </box>
  );
}
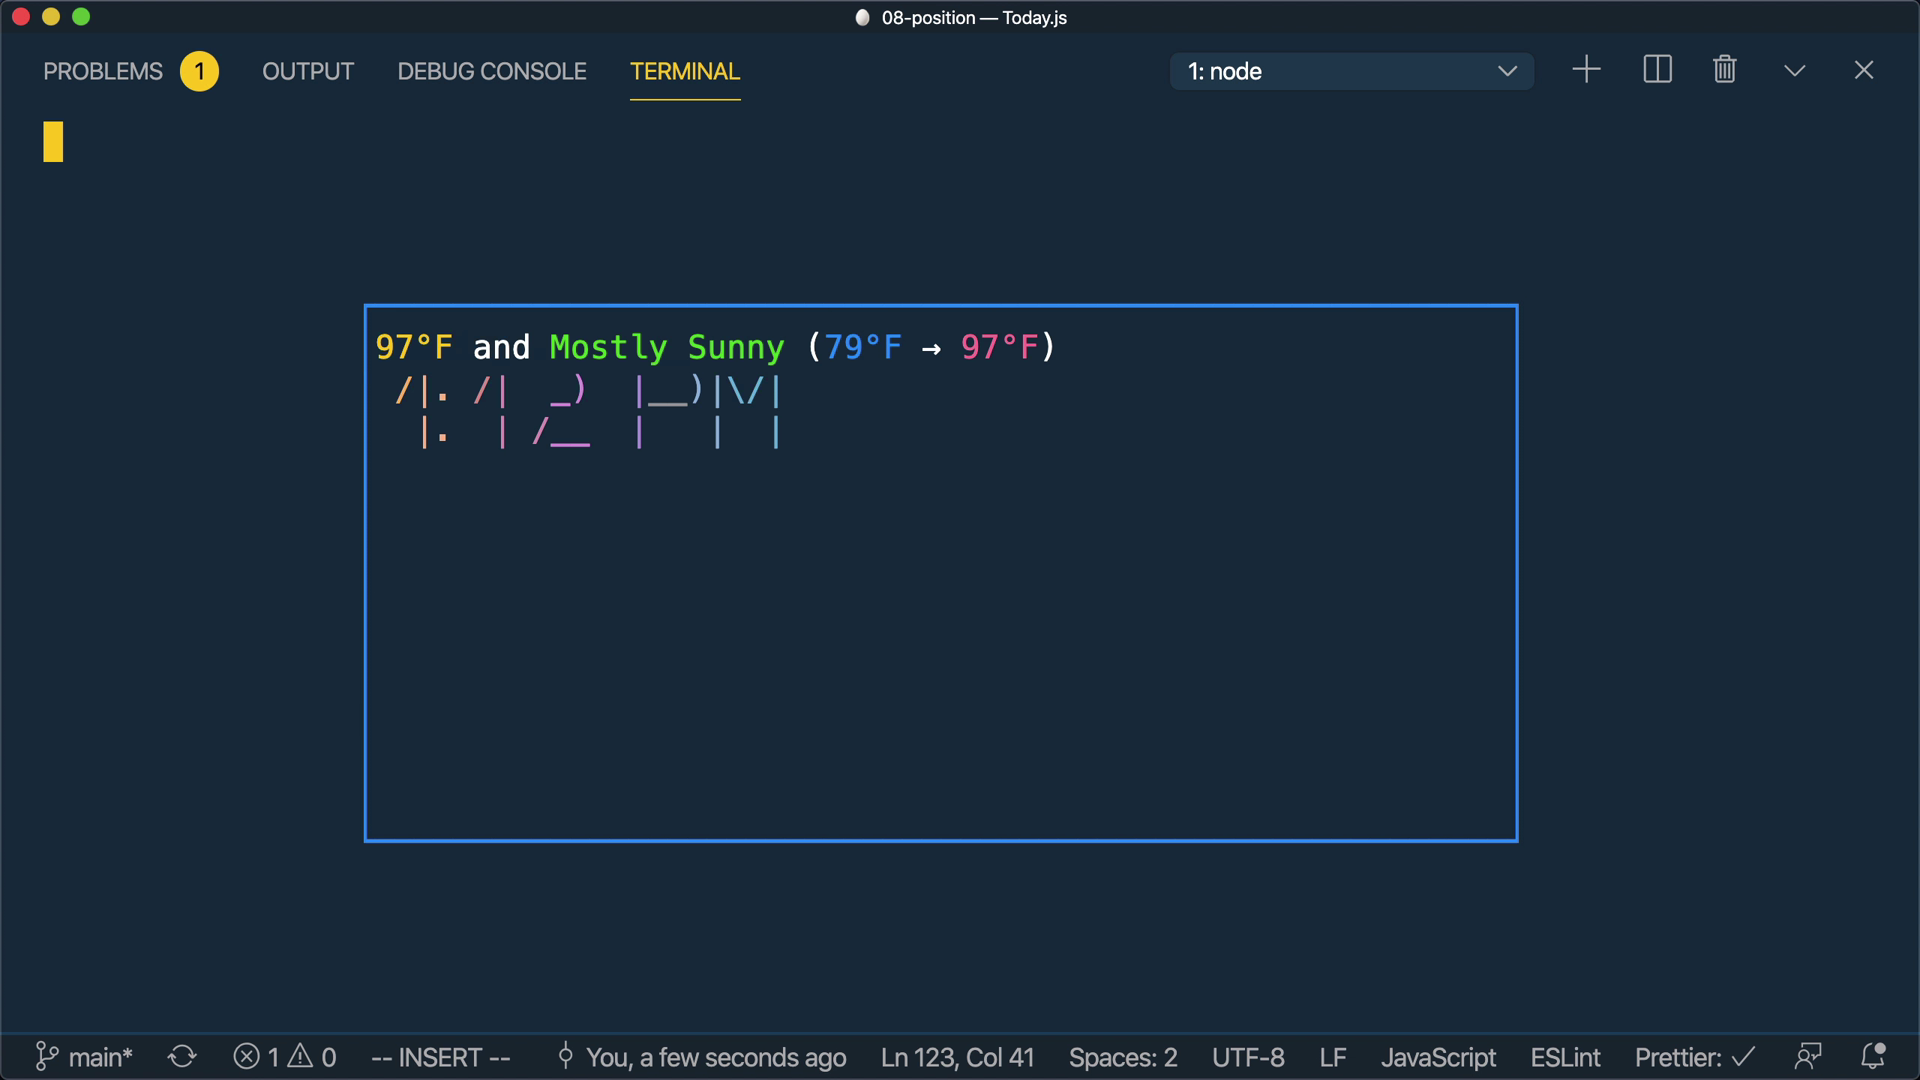
If we run our app now, we'll see that all the content is overlapped on top of each-other, which isn't what we want.
Vertically Center Time and Bottom Align Weather
If we come back to our code, we can adjust where the text gets displayed by adding a top prop. For now, we'll leave the date variable as-is, but for the time we'll add a top prop of "center". And for the weather we'll add a top prop of "100%".
export default function Today() {
  /* ... */
  return (
    <box { /* ... */ }>
        <text>
            {chalk.blue(date)}
        </text>
        <text top="center">
            {gradient.atlas.multiline(time)}
        </text>
        <text top="100%">
            {weather.status === 'loading'
                ? 'Loading...'
                : weather.error
                ? `Error: ${weather.error}`
                : formatWeather(weather.data)}
        </text>
    </box>
  );
}
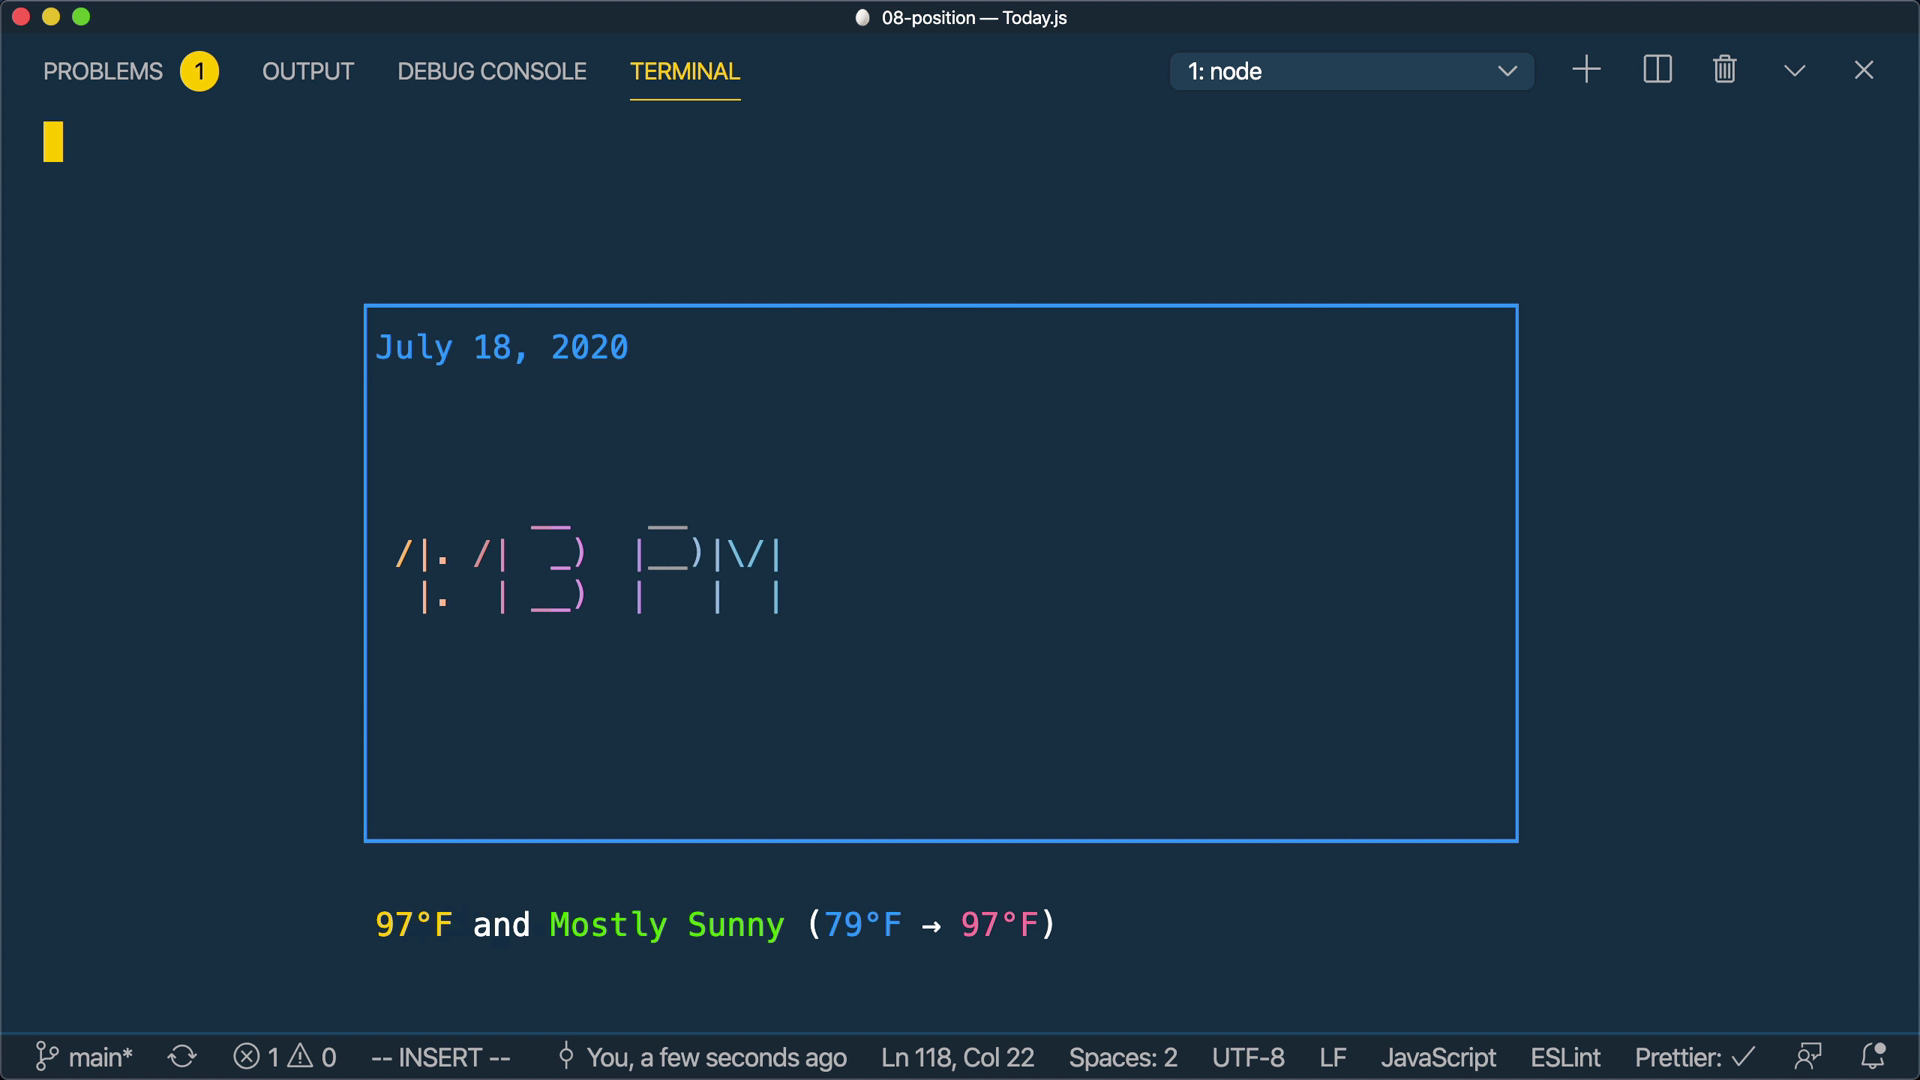
Now, if we run our app again, we'll see that things look a "bit" better, but not quite what we wanted. The weather information is outside the boxed area.
Fix Weather Alignment with Relative Adjustment
We technically don't want the top of our text to be the very bottom of the box. Thankfully the position props understand relative offsets, so we modify the position by adding a "-3" after the "100%".
export default function Today() {
  /* ... */
  return (
    <box { /* ... */ }>
        <text>
            {chalk.blue(date)}
        </text>
        <text top="center">
            {gradient.atlas.multiline(time)}
        </text>
        <text top="100%-3">
            {weather.status === 'loading'
                ? 'Loading...'
                : weather.error
                ? `Error: ${weather.error}`
                : formatWeather(weather.data)}
        </text>
    </box>
  );
}
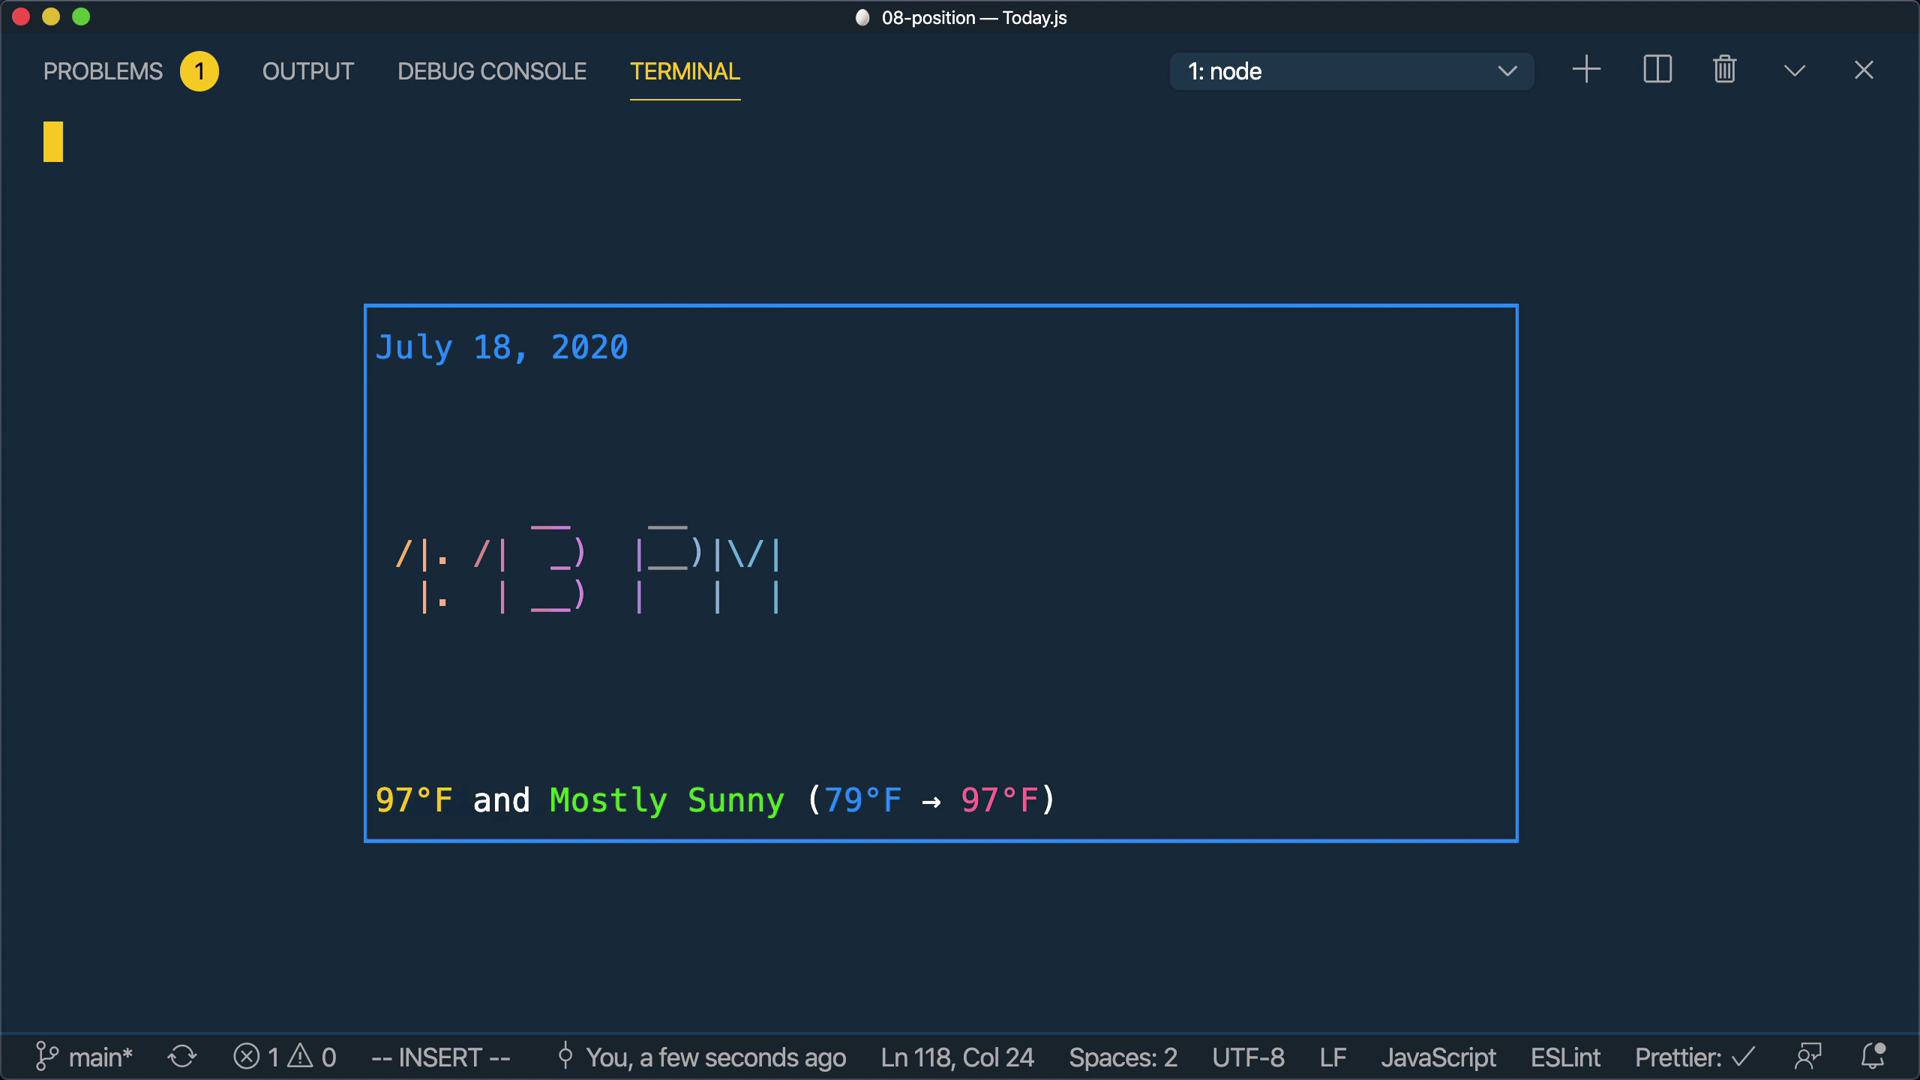
Now, if we run our app our, the weather information will now be in-side the box. Yay!
NOTE: Instead of using
top="100%-3"we could have usedbottom={0}to fix the issue. This is actually preferable since you don't have to worry about adjusting for the height of the text.
Horizontally Align Weather and Right Align Date
Now let's focus on getting our date to be right aligned in the box. To do that, we'll add a prop of right and set it to the number 0. It's important you use a number here and not the string of "0".
In addition, let's do a little alignment of the time as well. We'll horizontally center the time in the box by adding a left prop of "center".
export default function Today() {
  /* ... */
  return (
    <box { /* ... */ }>
        <text right={0}>
            {chalk.blue(date)}
        </text>
        <text top="center" left="center">
            {gradient.atlas.multiline(time)}
        </text>
        <text top="100%-3">
            {weather.status === 'loading'
                ? 'Loading...'
                : weather.error
                ? `Error: ${weather.error}`
                : formatWeather(weather.data)}
        </text>
    </box>
  );
}
Now, when we run our app you'll see that our date is indeed aligned to the right and our time is not only centered vertically, but also horizontally.
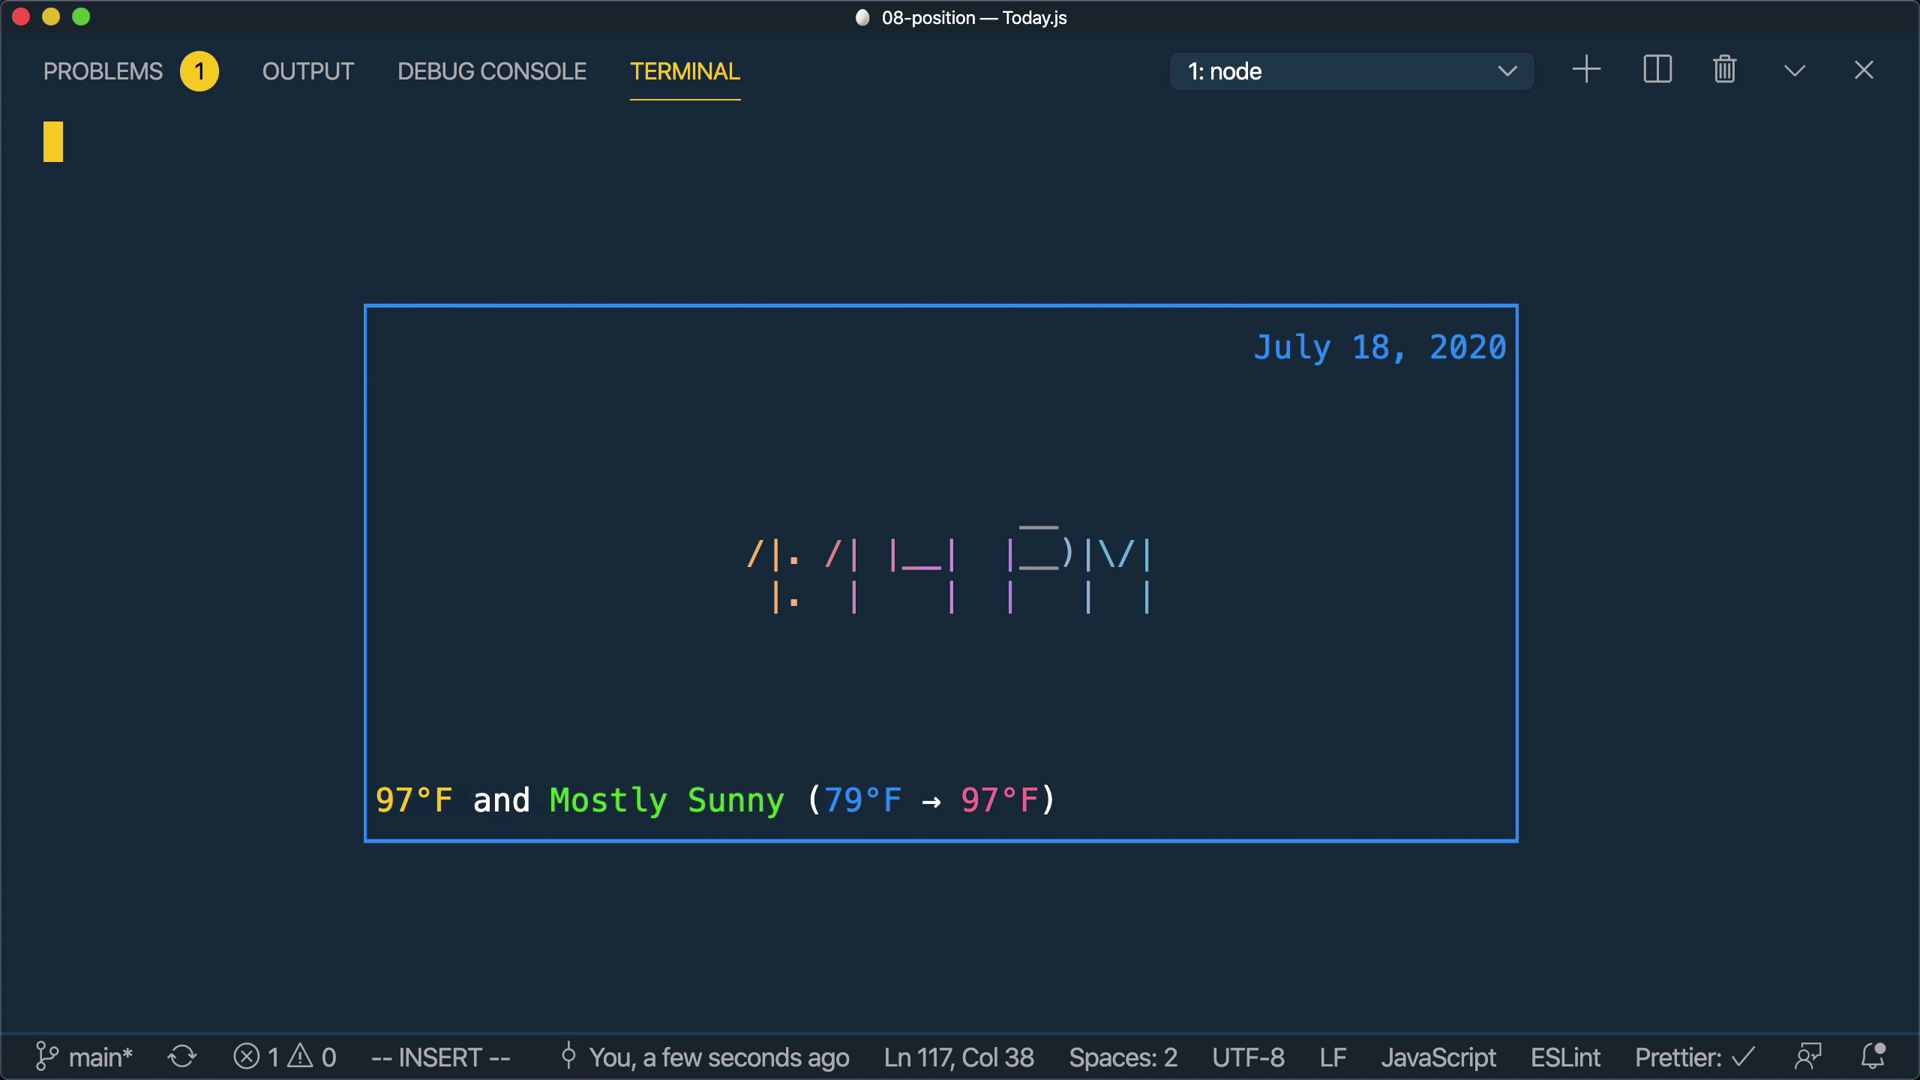
Give Date and Weather a Little Breathing Room
The elements look nicer than before, but the date and weather are hugging the edge of the box a bit too close for my liking.
So, let's come back to our code and do a little adjustment. For the date we'll modify the right prop to be 1 instead of 0. And for the weather we'll add a left prop of 1 (which will push it over just a little bit).
export default function Today() {
  /* ... */
  return (
    <text right={1}>
        {chalk.blue(date)}
    </text>
    <text top="center" left="center">
        {gradient.atlas.multiline(time)}
    </text>
    <text top="100%-3" left={1}>
        {weather.status === 'loading'
            ? 'Loading...'
            : weather.error
            ? `Error: ${weather.error}`
            : formatWeather(weather.data)}
    </text>
  );
}
And now when we run our app, our elements all look nicely aligned.
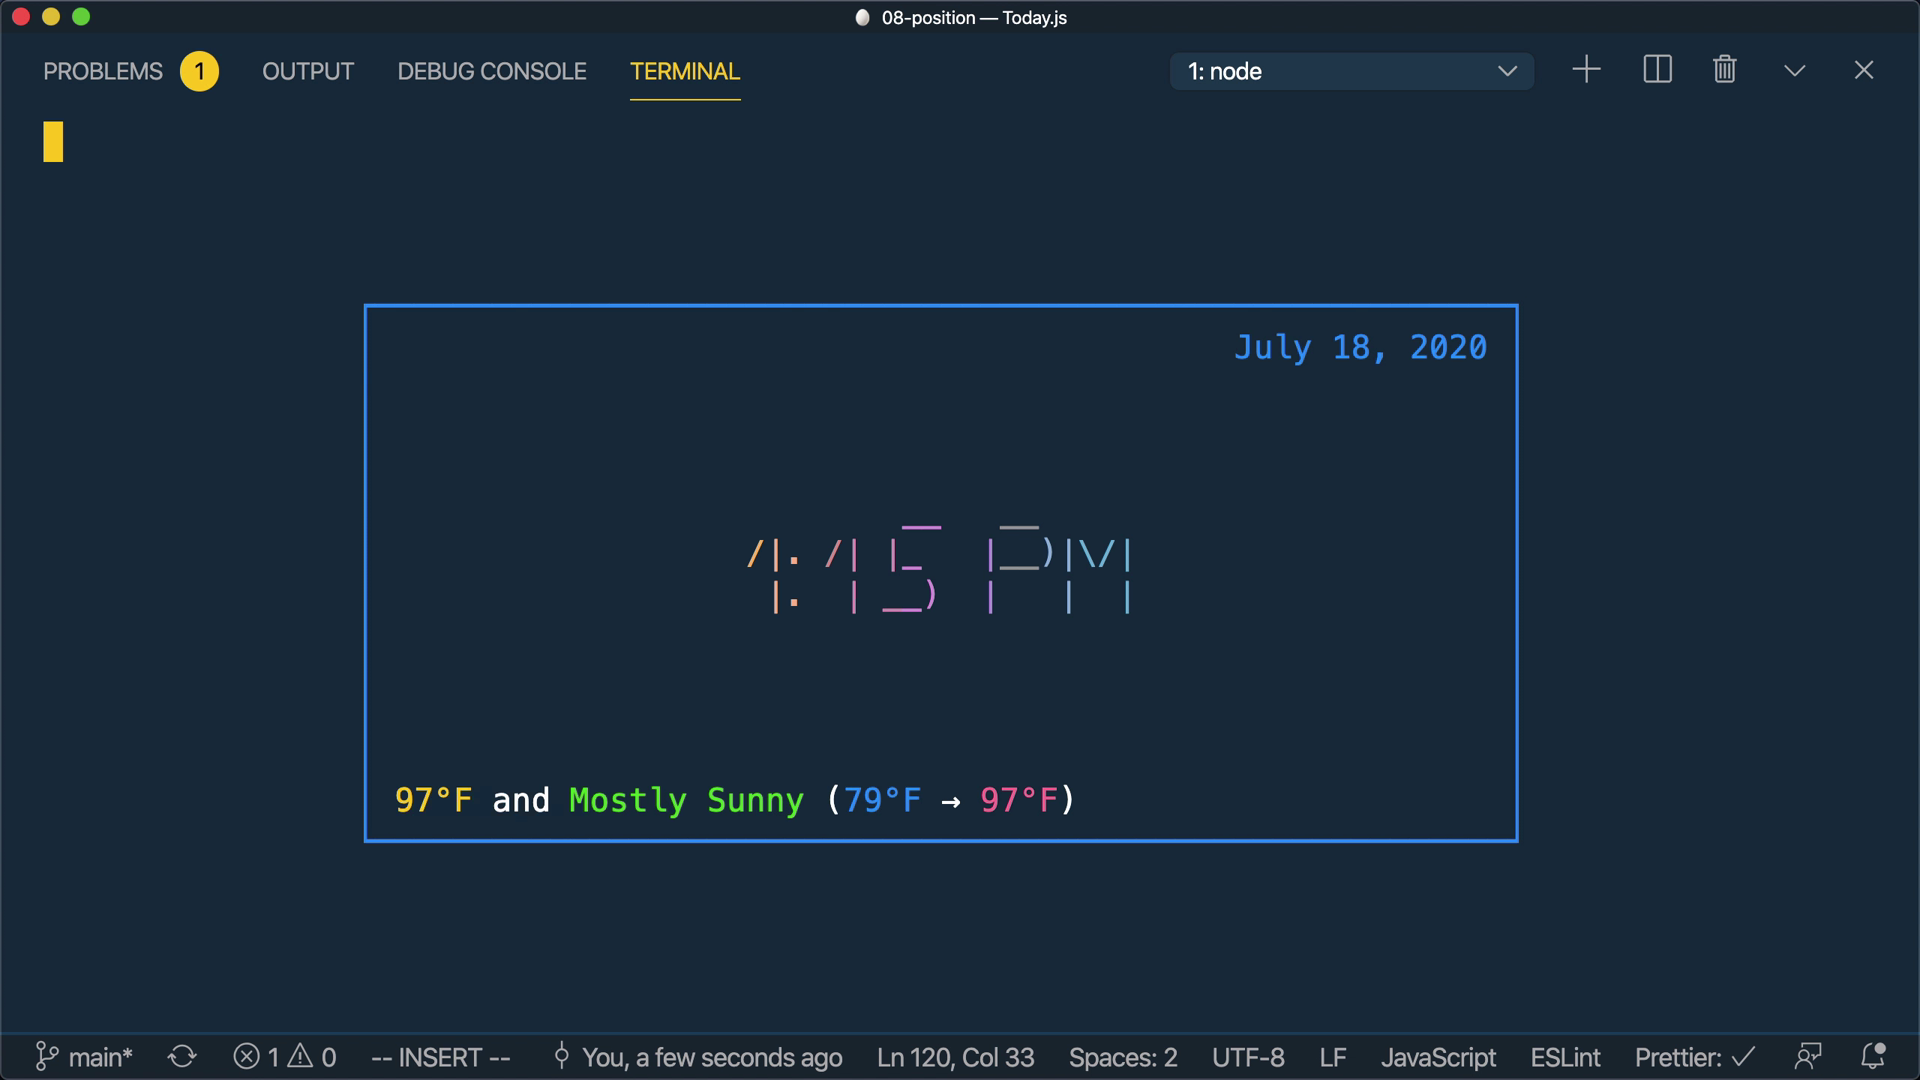
Conclusion
This concludes the Today component. In following lessons we'll talk about laying out sections in our dashboard, creating other components (such as Time Log, Pomodoro, Recent Commits, etc...), and covering other interesting topics along the way.
Tweet about this post and have it show up here!